Easy Peanut Butter Cookie Cups (Family Favorite)
These Easy Peanut Butter Cookie Cups have been one of those treats that bring generations together. They’re soft, chewy, and filled with those nostalgic miniature peanut butter cups that seem to disappear the second the bag is opened.
Servings: 48 pieces
Calories: 95kcal
As an Amazon Associate I earn from qualifying purchases.
Equipment
Ingredients
- 1/2 Cup Sugar
- 1/2 Cup Brown Sugar firmly packed brown sugar
- 1/2 Cup Butter softened
- 1/2 Cup Creamy Peanut Butter
- 1 Large Egg
- 1/2 Teaspoon Vanilla Extract
- 1 1/4 Cups All-Purpose Flour
- 3/4 Teaspoon Baking Soda
- 1/4 Teaspoon Salt
- 13 Ounces Miniature Peanut Butter Cups 1 (13-ounce) package miniature peanut butter cups, unwrapped
Instructions
- Heat your oven to 350°F. Lightly spray a mini muffin pan with nonstick cooking spray and set aside.
- Make the Cookie Dough. In a mixing bowl, beat together the sugar, brown sugar, softened butter, and creamy peanut butter until smooth and creamy. Add the egg and vanilla and continue mixing.1/2 Cup Sugar, 1/2 Cup Brown Sugar, 1/2 Cup Butter, 1/2 Cup Creamy Peanut Butter, 1 Large Egg, 1/2 Teaspoon Vanilla Extract
- Add the flour, baking soda, and salt. Mix on low, just until everything comes together.1 1/4 Cups All-Purpose Flour, 3/4 Teaspoon Baking Soda, 1/4 Teaspoon Salt
- Shape and Bake. Roll the dough into 1-inch balls and place one into each muffin cup.
- Bake for 11–13 minutes. Check at 10-11 minutes to see if the tops are lightly golden, being careful not to overbake as they can become dry.
- Add the Peanut Butter Cups. Right when the cookie cups come out of the oven, gently press one miniature peanut butter cup into the center of each. They will melt slightly into the warm cookie. This is exactly what you want!13 Ounces Miniature Peanut Butter Cups
- Allow the cookie cups to cool in the pan for at least 30 minutes so they firm up.
- Use a small teaspoon to help lift them out of the pan without breaking.
Notes
Helpful Tips for Success
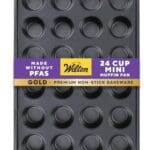
- Use a mini muffin pan for that signature thick, soft cookie cup shape.
- Shape evenly sized balls so the cups bake uniformly.
- Cool longer than you think. The cookie cups firm up as they rest.
- Remove gently. A teaspoon or small offset spatula works beautifully.
- Want smoother edges? Lightly press the dough into the cup before baking.
- Save Time. While the cookies are baking. Unwrap your candies while the cookies are still in the oven. It makes it easy to press the chocolate into the cookies while they're still warm.
How Do You Know When Peanut Butter Cookie Cups Are Done?
- Peanut butter cookies can go from perfectly soft to dry and crumbly pretty quickly, so knowing when to pull them from the oven is key. These cookie cups are done when the tops look set and lightly golden, but not dark brown. The edges should look just barely firm while the centers still appear soft. They’ll finish setting as they cool in the pan.
- A good rule of thumb is to check them at the 10-minute mark. If you can gently press the top of a cookie and it springs back without sinking, they’re ready. Pulling them out a minute early is always better than leaving them in too long, especially since they continue to bake from the residual heat of the muffin tin.
Should I Sift the Dry Ingredients?
- Sifting the flour, baking soda, and salt before adding them to the wet ingredients isn’t strictly required for this recipe, but it can help make your cookie cups lighter and more tender. Sifting removes lumps, aerates the flour, and ensures that the baking soda and salt are evenly distributed.
- If you don’t sift, just be sure to mix the dry ingredients together well before adding them to the wet ingredients. Either way, your cookies will turn out soft, chewy, and delicious.
Nutrition
Calories: 95kcal | Carbohydrates: 14g | Protein: 2g | Fat: 4g | Saturated Fat: 1g | Polyunsaturated Fat: 1g | Monounsaturated Fat: 2g | Trans Fat: 0.01g | Cholesterol: 4mg | Sodium: 78mg | Potassium: 51mg | Fiber: 1g | Sugar: 9g | Vitamin A: 10IU | Vitamin C: 0.02mg | Calcium: 16mg | Iron: 0.4mg

