How to build a planter box or raised garden bed Step-by-Step
This step-by-step guide should help you build your planter box efficiently. If you have any specific dimensions or modifications, adjust the cuts and assembly accordingly.
Yield: 1 planter box
Cost: 110
As an Amazon Associate I earn from qualifying purchases.
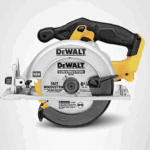
Equipment
Materials
- 9 pieces of 1 in. x 6 in. x 8 ft. Cedar lumber
- 2 pieces of 2 in. x 2 in. x 8 ft. Cedar lumber
- 36 coated deck screws
Instructions
Step-by-Step Instructions:
Prepare Materials:
- Cut 3 of the 8 ft. cedar boards in half, resulting in six 4 ft. boards.9 pieces of 1 in. x 6 in. x 8 ft. Cedar lumber
- From the 2 in. x 2 in. cedar lumber, cut six 17 to 18 inch segments for bracing and framing. Adjust if needed based on your board widths.2 pieces of 2 in. x 2 in. x 8 ft. Cedar lumber
Build the Long Sides:
- Begin with one end of the 4 ft. cedar boards. Secure 3 of these boards horizontally onto one set of the 2 in. x 2 in. frame pieces using 6 deck screws per board.36 coated deck screws
- Move to the opposite end and repeat the process with another set of 4 ft. boards and 2 in. x 2 in. frame sections.
- Find the centers of these two sections and secure the remaining 2 in. x 2 in. frame pieces to each center.
- Finally, secure the remaining 4 ft. boards at each end.
Assemble the Short Ends:
- Repeat the same process for the shorter sides of the planter box using the remaining 4 ft. boards and 2 in. x 2 in. frame pieces.
Finish and Secure:
- Ensure all boards are securely fastened with the deck screws.
- Double-check the stability and alignment of the planter box.

