Last updated on August 3rd, 2025 at 11:29 am
With our easy guide you can make Kombucha. It’s easier than you may be thinking. Craft your own kombucha at home using pantry staples and a living culture. Learn the full process from sweet tea to SCOBY and beyond—with tips for first-time brewers, homesteaders, and fermentation lovers.
Why Learn to Brew Your Own Kombucha?
Making your own kombucha is more than a fun kitchen experiment. It’s a return to traditional skills that support health, independence, and sustainability.
If you’re someone who grows your own food, keeps chickens, bakes sourdough, or simply wants to rely less on the store, brewing kombucha fits right into the homesteading mindset.
This fermented tea has been prized for generations as a natural way to support the immune system, aid digestion, and provide a refreshing, lightly fizzy drink without the added chemicals found in store-bought sodas.
When you brew your own, you’re not only saving money—you’re also cutting back on waste, embracing zero-waste kitchen habits, and customizing the flavors to your exact tastes.
New to Fermentation?
If you’re new to fermentation, kombucha is a great option to start with. It requires only a few ingredients—black tea, cane sugar, clean water, and a SCOBY (short for Symbiotic Culture of Bacteria and Yeast).
The process is forgiving, creative, and deeply satisfying. And best of all, once you’ve got a batch going, it keeps going!
Each fermentation process creates a new SCOBY, allowing you to make batch after batch for pennies.
Easy Guide
This guide walks you through primary fermentation, the essential first step in kombucha brewing. We’ll cover everything: how to brew sweet tea, introduce a SCOBY, ferment your tea properly. And even how to grow your own SCOBY from scratch if you don’t already have one.
By the end, you’ll be ready to enjoy your own kombucha, flavored or plain, fizzy or still—and completely homemade.
If you’ve ever stared at the rows of commercial kombucha at the store wondering if you could make something just as good (or better), the answer is yes.
And once you get the hang of it, you’ll be turning out variety of bottle types, flavors, and levels of fizz using second fermentation techniques we’ll link to at the bottom of this guide.
Grab your tea kettle and a clean jar—it’s time to master kombucha primary fermentation, the homesteader’s way.
What You’ll Need to Brew Primary Kombucha
Equipment:
- 1 wide-mouth glass jar (at least 1-gallon size)
- A coffee filter, clean paper towel, or breathable cloth
- 1 rubber band to secure the cover
- 1 wooden spoon
- 1 measuring cup
- Clean hands and workspace
- Optional: pH strips

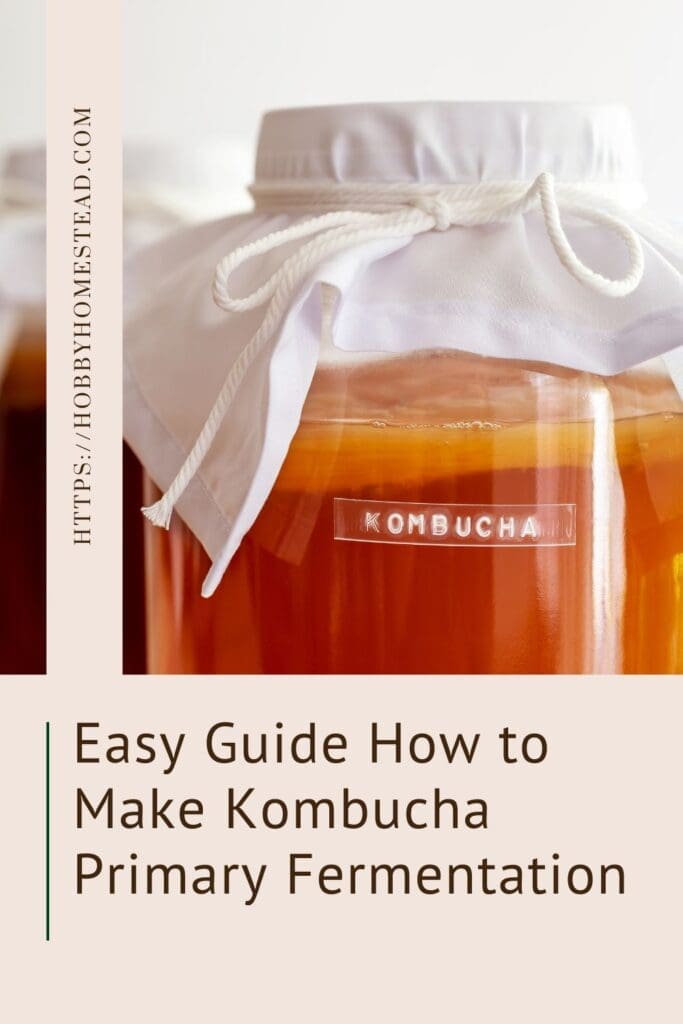
Easy Guide How to Make Kombucha Primary Fermentation
As an Amazon Associate I earn from qualifying purchases.
Equipment

Ingredients
- 1 Symbiotic Culture of Bacteria and Yeast SCOBY
- 1 Cup Cane Sugar or white sugar
- 8 Bags Black Tea or 2 tablespoons of green tea, or white tea
- 14 Cups Water filtered cold water,
- 1-2 Cups Starter Tea from a previous batch of kombucha or store-bought kombucha, unflavored
Instructions
- Brew the Tea. Bring 4 cups of water to a boil. Add tea bags or loose tea. Steep for 5–10 minutes. Stir in the cup of sugar until fully dissolved.8 Bags Black Tea, 14 Cups Water, 1 Cup Cane Sugar
- Cool Down. Add the other 10 cups of cold water to the sweet tea and allow it to cool to room temperature.
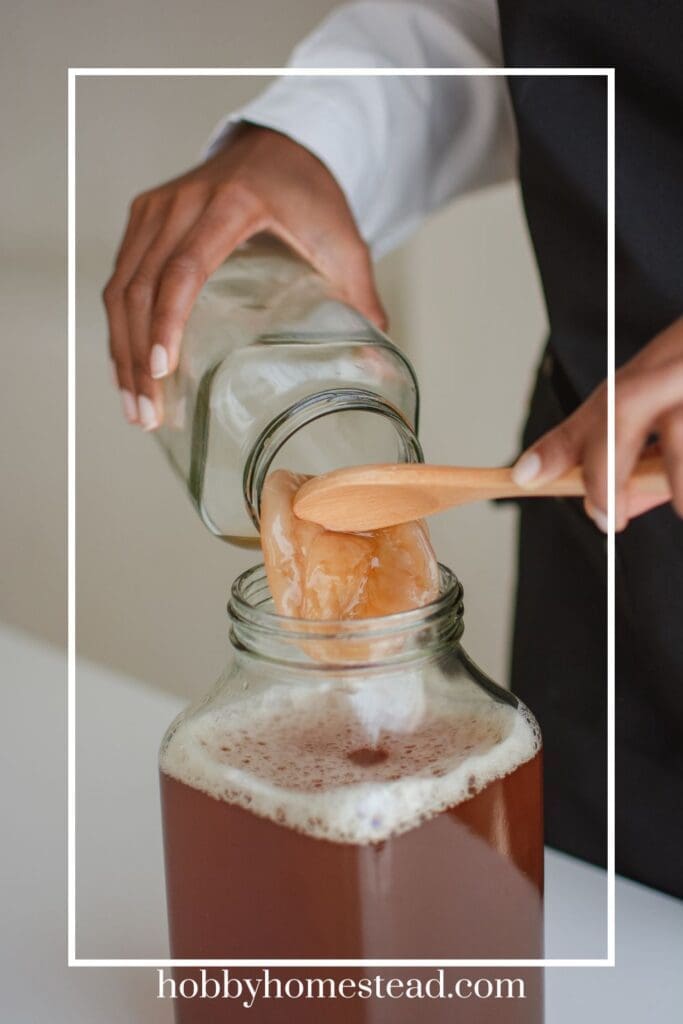
- Assemble the Ferment. In a large fermentation vessel, pour in the cooled sweet tea. Add your starter liquid and gently place the SCOBY on top. Pro Tip. Never add a SCOBY to hot tea—it can kill the culture.1-2 Cups Starter Tea, 1 Symbiotic Culture of Bacteria and Yeast
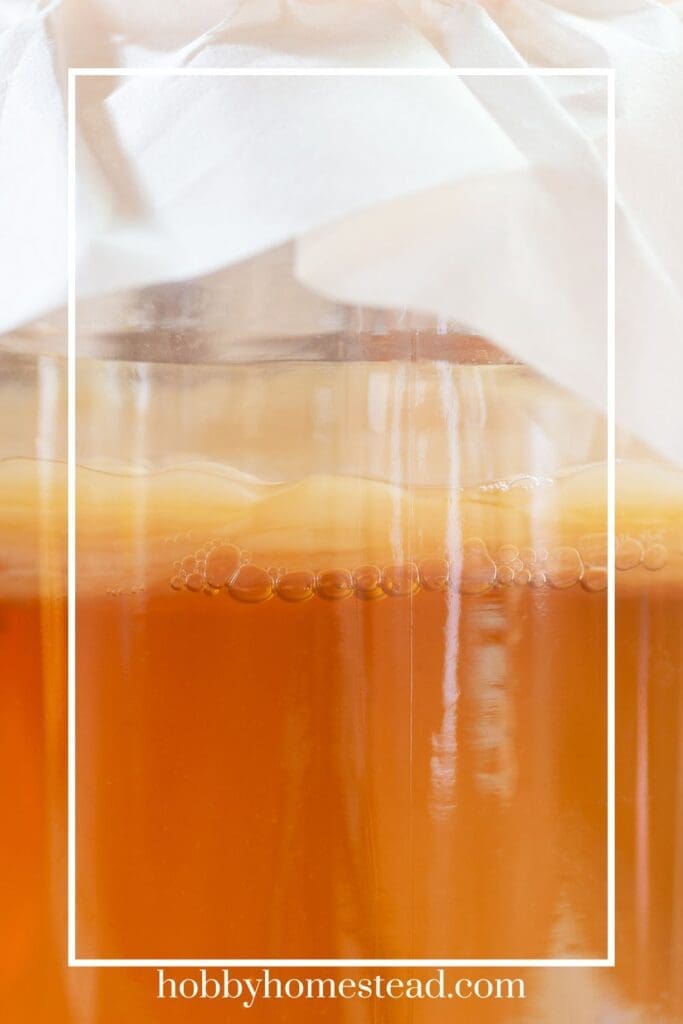
- Cover and Ferment. Secure a coffee filter or cloth over the jar with a rubber band. Place in a warm spot, out of direct sunlight. Warmer temperatures will ferment faster (ideal is 70–78°F).
- Check and Taste. After 7 days, start tasting. Use a clean straw to draw out a sip. If it’s still very sweet, wait a few more days. The kombucha should taste tangy, slightly sweet, and have a light vinegar aroma by the end of primary fermentation.
- Ready for the Next Step. Once it suits your personal taste, it’s ready! Save 1–2 cups of starter tea for your next batch and move the rest to glass bottles for drinking or secondary fermentation.
Notes
Tips for Brewing Success
• Always wash hands before handling the SCOBY. • Avoid metal contact with your kombucha culture. • If white or green fuzz appears, discard the batch—mold spores have taken hold. • Label each batch with the date so you can track your fermentation time. • Use flip-top bottles for the second fermentation if you want fizz.How to Make Your Own SCOBY (If You Don’t Have One Yet)
If you don’t have a kombucha making kit or starter kombucha from a friend, you can still start from scratch. Here’s how to grow your own organic kombucha SCOBY: Ingredients:• 1 bottle plain, unflavored, raw kombucha (store-bought, with live cultures) • 1 cup hot water • 1 tablespoon black tea (or 1 bag) • 1 tablespoon cane sugar Instructions:
1. Steep the tea in the hot water for 5–10 minutes. 2. Stir in the sugar until fully dissolved. 3. Let it cool to room temperature. 4. Pour the sweet tea into a clean jar, then add the bottle of store-bought kombucha. 5. Cover with a coffee filter or paper towel and secure with a rubber band. 6. Place in a warm spot, out of direct sunlight, and wait 2 to 4 weeks. You’ll soon notice a jelly-like layer forming on top—your kombucha mother! This is your SCOBY, and once it’s about ¼ inch thick, you can use it to brew your first batch of homemade kombucha.
Nutrition
Why Do a Second Fermentation?
The 1st fermentation produces plain, slightly sour kombucha tea. It’s refreshing on its own, but if you want bubbles and flavor, it’s time for a second fermentation. During this stage, you can add fruit juice, spices, or herbs—like ginger, berries, or mint—into sealed bottles. The natural sugars create carbon dioxide, giving you a fizzy, flavorful drink.
Learning to ferment your own drinks is a powerful homesteading skill. With this easy guide to kombucha primary fermentation, you’ve taken a meaningful step toward traditional food preservation. While reducing your kitchen waste and boosting your family’s wellness. All with a humble jar of tea.
Once you’ve brewed your first batch, try experimenting with different flavors, teas, and sweeteners like maple syrup in future batches. Happy Brewing!
Ready to flavor and fizz your tea? Next, we’ll have to master the 2nd fermentation phase.


Thank you for sharing this recipe.