Last updated on April 25th, 2025 at 09:58 am
If you’re dreaming of starting your vegetable garden or filling your yard with beautiful annual flowers, learning how to germinate seeds indoors is a good idea. Especially if you want a head start on the growing season. With the right setup and a little patience, you can grow your own plants from fresh seed, ensuring disease-free seedlings that are ready to thrive in the great outdoors after the last frost date.
Every April, my mom’s front porch was full of trays of seeds. She used all sorts of containers. There was always a spray bottle nearby for misting. And various types of coverings for each container. She knew the special care each different seedling needed to grow up into a strong and healthy plant.
Understanding the art and science behind nurturing seeds into healthy plants indoors requires careful preparation and a touch of horticultural knowledge.
What is Indoor Seed Starting?
Indoor seed starting is the best method for getting a head start on your growing season by planting seeds indoors before the last frost date in your area.
Instead of waiting for warm weather to direct sow seeds directly into your vegetable garden or flower beds, you can sow seeds in seed trays, peat pellets, or individual containers inside your home. This way, by the time the great outdoors is ready, you’ll already have healthy seedlings with sets of true leaves, ready to transplant.
Table of contents
Why Start Seeds Indoors?
Starting seeds indoors lets you control the environment. Things like soil temperatures, light source, growing medium, and moisture levels. Giving vegetable plants, annual flowers, and even herbs the ideal conditions for seed germination.
Better Plant Spacing
By starting seeds indoors, you can control the spacing of your plants more precisely. This means when you transplant them outdoors, you’ll have larger, healthier plants that require less thinning. It’s definitely a time and money saver, since you won’t need to buy as many seeds or spend extra effort thinning out overcrowded seedlings later on. Plus, it ensures that each plant gets the optimal amount of space to thrive in your garden.
Reducing Weed Issues
Starting seeds indoors can help reduce weed growth in a few ways:
- Stronger Plants Outcompete Weeds
When you transplant larger, more mature seedlings into the garden, they have a head start over any weeds trying to grow nearby. Established plants with well-developed roots and leaves can shade out smaller weeds, limiting the weeds’ access to sunlight. - More Precise Planting = Less Disturbance
Direct seeding often involves disturbing larger areas of soil, which can bring dormant weed seeds to the surface, giving them a chance to germinate. With transplants, you only disturb the specific spots where you plant the seedlings, leaving fewer opportunities for weed seeds to sprout. - Denser, Planned Plant Spacing
When you transplant healthy seedlings at the right spacing, the plants grow quickly and fill in the space, leaving fewer bare areas where weeds can establish themselves. - Less Thinning = Fewer Opportunities for Weeds
If you start seeds indoors and plant exactly what you need, you don’t have to thin seedlings later, which often stirs up soil and gives weeds a fresh chance to sprout.
Overall, starting seeds indoors helps you plant with intention and efficiency, giving your crops the upper hand over weeds right from the start.

Give Your Plants a Head Start
It’s a good idea if you want to grow warm season crops like tomatoes, cucumbers, and watermelons, which need warm soil to thrive.
Indoor seed starting works well using a variety of containers like cell trays, peat pots, or even egg cartons for small seeds. You can also use a plastic bag and paper towel for an easy way to check the germination rate of your seeds before planting them into potting mix or soilless mixes. Whether you’re growing flower seeds, vegetable plants, or herbs like sage, starting indoors means you’ll have disease-free seedlings ready for transplanting.
To give your seeds the best chance, you’ll need to provide good light — either a south-facing window, fluorescent light fixtures, or LED lights placed close to the tops of the seedlings. Using a heat mat can help maintain warm soil for crops that need it, and keeping a spray bottle nearby ensures you won’t use too much water and risk fungal diseases.
Whether you’re starting a few plants for your own garden or filling larger containers for a big box store-sized project, indoor seed starting is one of the best ways to grow your own plants from seed packet to garden-ready seedling.
A Beginners Guide
In this comprehensive guide, we delve into the fundamentals of how to germinate seeds indoors effectively. Whether you’re aiming to extend your growing season, cultivate exotic plants, or simply enjoy the therapeutic benefits of gardening, mastering these techniques will set you on the path to successful seed propagation.
Let’s explore the steps and strategies that will empower you to transform seeds into flourishing seedlings, right from the comfort of your home.
General Tips for Successful Seed Starting
- Use seed trays, cell packs, or individual containers with drainage.
- Cover with plastic wrap or plastic domes to maintain humidity until seeds sprout.
- Use fluorescent light fixtures or LED lights if natural light is insufficient.
- A heat mat can provide the warm soil temperatures needed for warm-season crops.
- Water with a spray bottle to prevent disturbing tiny seeds.
- Once seedlings develop their second set of leaves, begin watering with diluted water-soluble fertilizer.
- Transplant into larger containers before moving outdoors after the last frost date.
- Harden off seedlings by gradually exposing them to the great outdoors over a week before planting in the vegetable garden.
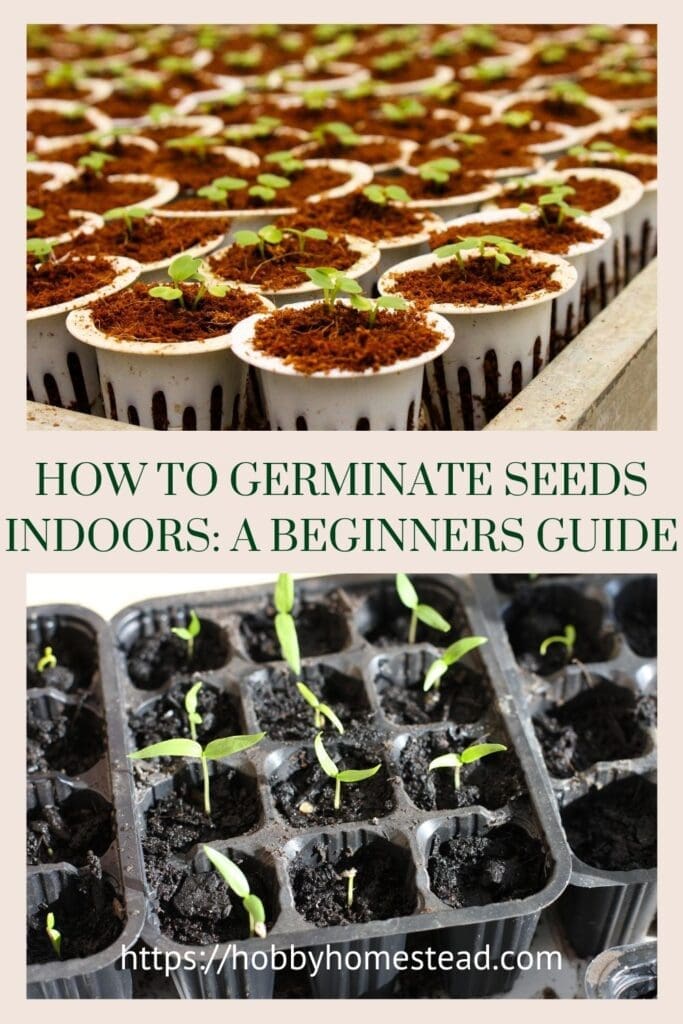
How to Germinate Seeds Indoors
This easy way to start vegetable plants and flower seeds doesn’t require a fancy greenhouse. You can begin right on a kitchen counter, a shelf, or a south-facing window. Whether it’s your first time trying indoor seed starting or you’re hoping for better results than last year, this guide will walk you through the best method for successful seed germination right at home.
Gather Your Supplies
Before you get started, it’s a good time to gather everything you’ll need. Most of these can be found at garden centers, big box stores, or even around the house. Some items you can even reuse from year to year, like plastic trays and fluorescent light fixtures.
Basic Seed Starting Supplies
- Seed packets. Check the back of each seed packet for important details like best time to plant, soil temperatures, and whether the type of seed does best indoors or with direct sow outdoors.
- Seed trays or cell trays. These are perfect for starting multiple seeds in a compact space.
- Peat pots, egg cartons, or individual containers. These work well for larger seeds like sweet potatoes.
- Seed-starting mix. A lightweight, soilless mix designed specifically for seed germination. Avoid using regular garden soil, which can introduce weed seeds or fungal diseases.
- Plastic wrap or clear plastic domes. These help trap moisture and warmth during germination.
- Spray bottle. A spray bottle delivers a fine mist to keep the soil surface moist without disturbing seeds.
- Grow lights or fluorescent lights. Natural light from a sunny window isn’t always enough light, so having a light source like LED lights or fluorescent light fixtures can make a big difference.
Choosing the Right Seeds for Indoors
Not every type of plant benefits from indoor seed starting. Some plants — like root vegetables — prefer to be direct sown after the frost dates pass. But plenty of vegetable plants and annual flowers thrive when given a head start indoors.
Great seeds to start indoors including:
- Tomatoes and peppers, which love warm season weather.
- Herbs like basil, parsley, and dill.
- Flower seeds such as marigolds, petunias, and zinnias.
- Vegetable plants like broccoli, lettuce, and cabbage that appreciate warm soil to germinate but prefer cooler outdoor weather later.
Always check the seed packet to see the best choice for each type of seed and its recommended starting time. Usually early April for most crops if you live in temperate areas.
Preparing Your Growing Space
Find a warm place where your seeds can germinate. Many seeds germinate best at around room temperature (65-75°F), with some warm season crops like peppers preferring even warmer conditions in the root zone. A heat mat placed under your plastic trays can help maintain warm soil and speed up the germination rate.
Once seeds sprout, they need good light. Ideally from fluorescent lights, LED lights, or natural light from a south-facing window. If your space doesn’t get enough light, adding a light fixture or hanging grow lights just a few inches above the seedlings ensures healthy, strong growth.
Planting and Caring for Seeds
Once you have your type of container, growing medium, and light source ready, it’s time to plant!
- Fill cell packs, small pots, or individual containers with seed-starting mix or a blend of peat moss and potting mix.
- Moisten the mix with parts water and stir gently. You want it damp, but not soggy.
- Follow the seed packet instructions for planting depth. Some large seeds need to be pressed deeper into the soil surface, while smaller seeds sit right on top.
- Cover the trays with plastic wrap or place them inside a plastic bag to retain moisture.
- Place the trays in a warm place and check daily. Use a spray bottle to keep the soil surface evenly moist.
- As soon as you see sprouts, remove any plastic cover to prevent excess moisture buildup.
Supporting Healthy Seedlings
After germination, healthy seedlings need good air circulation and enough light to thrive. A small fan set on low helps prevent fungal diseases by keeping air moving around the tops of the seedlings.
Once seedlings develop their first set of true leaves, they’ll need more space and nutrients. Transplant them into larger containers filled with potting soil or soilless mixes. This is also a good time to begin feeding with a diluted water-soluble fertilizer, about half strength to start.
As they grow, watch for:
- Excess water, which can lead to damping off or root rot.
- Too Much water on leaves, which encourages fungal problems.
- Light source distance. Keep grow lights 2-4 inches above the tops of the seedlings.
Hardening Off and Transplanting Outdoors
About 1-2 weeks before planting in the great outdoors, it’s important to harden off your plants. This means gradually exposing them to outdoor conditions. Light, wind, and cooler temperatures, so they don’t go into shock.
You can do this by:
- Placing seedlings outside under a row cover for a few hours a day.
- Moving them to a cold frame to gradually adjust to outdoor soil temperatures.
Bring them in at night if the temperature drops too low.
When your seedlings have their second set of leaves (often called the first set of true leaves), they’re usually ready for larger containers or the vegetable garden.
Germinating Seeds in Peat Pellets
Peat pellets (also called Jiffy pellets) are a convenient way to start seeds because they provide good aeration, moisture retention, and easy transplanting. Here’s how to use them effectively:
Steps for Germinating Seeds in Peat Pellets:
- Hydrate the Pellets. Place the dry peat pellets in a tray and add warm water. They will expand in a few minutes.
- Plant the Seeds. Drop 1-2 seeds into the hole on top of each pellet. Cover lightly with a pinch of peat, if needed.
- Provide Warmth & Humidity. Cover with a humidity dome or plastic wrap and place the tray in a warm location (65-80°F).
- Keep Moist but Not Soggy. Use a spray bottle to mist when the pellets start to dry out.
- Give Light Once Sprouted. As soon as the seedlings emerge, place them under grow lights or in a sunny window for at least 12-16 hours per day.
- Transplanting. Once roots start poking through the sides of the pellet, it’s time to plant the entire pellet into larger containers or directly in the garden.
Best Seeds for Peat Pellets:
- Tomatoes, peppers, cucumbers, cauliflower, sage, sunflowers, dragon fruit, and eucalyptus seeds do well in peat pellets.
- Small seeds like strawberries also germinate well but may need extra care to avoid mold.

Special Seed Germination Tips
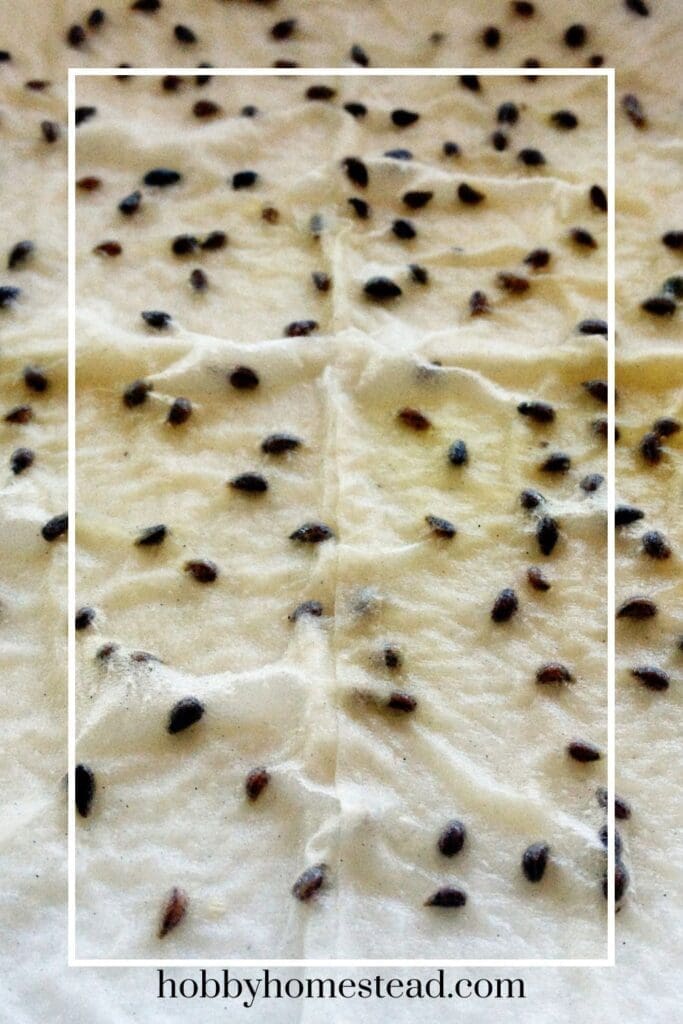
- Tomato Seeds (Paper Towel Method). Place seeds between damp paper towels, seal in a plastic bag, and store at room temperature until sprouted. Transfer to cell packs or peat pellets.
- Strawberry Seeds. Mix seeds with moist peat moss, seal in a plastic bag, and refrigerate for 2-3 weeks. Plant in small pots under good light.
- Dragon Fruit Seeds. Sow in a soilless mix. Cover with clear plastic to retain moisture and provide good light.
- Moringa Seeds. Soak seeds for 24 hours, then plant in individual pots with potting mix. Keep warm with good light.
- Eucalyptus Seeds. Use cell trays with sterile seed-starting mix. Press seeds onto the surface and mist with a spray bottle. Place in a warm, bright spot.
- Sage Seeds. Sow in well-drained potting mix, cover lightly with peat moss, and place in a south-facing window or under grow lights.
Germinating Cauliflower Seeds
Cauliflower seeds prefer warm soil but not excessively hot. Starting them indoors in seed trays filled with seed-starting mix is the best method for a successful head start. Use a spray bottle to moisten the soil surface without displacing the seeds. Cover the plastic trays with a plastic dome to hold in moisture until the first set of true leaves appears.
- Soil temperatures between 65-70°F are ideal for cauliflower seed germination.
- Once the seedlings develop a second set of leaves, you can transplant them into larger containers before eventually moving them to the great outdoors after your last frost date.
Germinating Cucumber Seeds
Cucumber seeds are larger seeds, which makes them easier to handle. They need warm soil for seed germination, so using a heat mat can speed things up. Cucumbers are a warm season crop, so timing is important. Early April is often the best time to start them indoors if your frost dates are late spring.
- Use peat pots or individual containers filled with potting mix.
- Place them under fluorescent lights or LED lights to ensure they get enough light.
- Once they have sets of true leaves, they can be hardened off with a row cover before planting in your vegetable garden.
Germinating Tomato Seeds in Paper Towels
If you’re looking for an easy way to check germination rates, using a paper towel method is a good idea, especially if you’re using last year’s seed packet. Simply dampen a paper towel with a parts water and bleach solution (optional for disease-free seedlings), then spread fresh seed on it. Place it in a plastic bag at room temperature.
- Check daily to ensure the paper towel stays moist — not too much water.
- Once the seeds sprout, carefully move them into cell trays filled with seed-starting mix.
- Provide good light using fluorescent light fixtures or grow lights.
Germinating Strawberry Seeds
Strawberry seeds can be a bit finicky. Starting them indoors is the best way to get a head start. They require a soilless mix in small pots or cell packs with good air circulation. Cover with clear plastic to retain moisture.
- Germination rates can be improved by chilling the seeds for 2-3 weeks before planting.
- Once they sprout, move the seedlings to a south-facing window or under light fixtures.
Germinating Strawberry Seeds in Paper Towels
This easy way skips the soil at first. Spread strawberry seeds on a damp paper towel, then seal them inside a plastic bag. Place the bag in a warm place (around room temperature).
- Check for sprouting after 1-3 weeks.
- Once sprouted, gently transfer the seeds into individual containers filled with seed-starting mix.
Germinating Watermelon Seeds
Watermelon seeds are large seeds that love warm soil, so a heat mat is often the best choice to speed up germination. Start them in peat pots or individual containers filled with potting mix.
- Watermelon seedlings need enough light from fluorescent lights or a south-facing window.
- Use a spray bottle to keep the soil surface moist.
- After the last frost date, they can move into your vegetable garden.
Germinating Dragon Fruit Seeds
Dragon fruit seeds are tiny but can be germinated indoors using seed trays or plastic trays filled with a soilless mix.
- Cover lightly with peat moss.
- Keep the growing medium moist but not too wet.
- Place under fluorescent lights or near a sunny window for good light.
- It’s a good idea to use a small fan to improve air circulation and prevent fungal diseases.
Germinating Sage Seeds
Sage seeds need warm soil and good light. Individual pots or cell packs filled with potting mix work well. Cover the soil surface lightly.
- Mist with a spray bottle and cover with clear plastic until seed germination occurs.
- Move under fluorescent lights or grow lights once the seedlings emerge.
- When they have sets of true leaves, you can transplant them into larger containers.
Germinating Coffee Seeds
Coffee seeds can be slow to sprout and require warm soil and high humidity. Start in individual containers filled with a soilless mix.
- Soak seeds in parts water for 24 hours before planting.
- Cover with plastic wrap or a plastic dome.
- Place in a warm place with good light.
- Germination rates vary, so patience is key.
Germinating Auto Seeds
Auto seeds, like those for autoflowering plants, need good light and warm soil for rapid germination. The paper towel method works well — simply moisten a towel, place the seeds inside, and seal in a plastic bag at room temperature.
- Once the seeds sprout, move them into individual containers filled with seed-starting mix.
- Good air circulation helps prevent fungal diseases.
- Use fluorescent lights or LED lights for optimal growth.
Germinating Moringa Seeds
Moringa seeds are large seeds that need warm soil and plenty of natural light. Start them in individual containers or cell packs filled with potting soil.
- Soak the seeds in warm water for 24 hours before planting.
- Place in a warm place and keep the soil surface moist.
- Once the first set of true leaves appears, move them into larger containers.
Germinating Eucalyptus Seeds
Eucalyptus seeds are tiny and prefer a soilless mix in small pots or cell packs.
- Mist the soil surface with a spray bottle and cover with clear plastic.
- Place under fluorescent lights for good light.
- Good air circulation with a small fan helps prevent fungal diseases.
Germinating Sunflower Seeds
Sunflower seeds are large seeds that are easy to direct sow, but you can start them indoors in peat pots or individual containers for a head start.
- Use potting soil with organic materials for best results.
- Place in a sunny window or under fluorescent light fixtures.
- A good time to transplant is after the last frost date.
Sign up for our newsletter and get a one page Seed Germination Troubleshooting Guide

Troubleshooting Common Issues: Why Are My Seeds Not Germinating?
If your seeds won’t sprout, here are some common reasons and how to fix them.
Temperature is Too Low or Too High
Most seeds need 65-80°F for germination. Tomatoes, cucumbers, and watermelon love warmer soil (70-85°F), while cauliflower and sage prefer slightly cooler temps (65-70°F).
Fix: Use a heat mat under trays for warmth or move seeds to a cooler spot if it’s too hot.
Too Much or Too Little Water
Overwatering can cause seeds to rot before sprouting.
Underwatering can dry out the seed coat, making it hard for the seed to break through.
Fix: Keep soil moist but not soggy. A spray bottle is great for delicate seeds.
Seeds Are Too Old
Some seeds (like strawberries and eucalyptus) have short viability and may not germinate well after a year.
Fix: Test older seeds using the paper towel method before planting.
Seeds Are Planted Too Deep
Small seeds like strawberries and sage need to be barely covered, while larger seeds like watermelon and sunflowers need to be buried deeper.
Fix: Follow seed packet depth instructions or start shallow and cover lightly with peat or vermiculite.
Not Enough Light After Sprouting
Seeds don’t need light to germinate, but as soon as they sprout, they need 12-16 hours of light daily.
Fix: Use grow lights or place seedlings in a south-facing window.
Poor Seed Quality or Wrong Storage
Seeds stored in high humidity or extreme temps may lose viability.
Fix: Store seeds in a cool, dry place in an airtight container.
Hard Seed Coats (Strawberries, Coffee, Moringa, Eucalyptus)
Some seeds have tough shells that need scarification (scratching) or soaking to speed up germination.
Fix:
- Strawberry seeds germinate better after a cold treatment (stratification) for 2-3 weeks.
- Moringa and coffee seeds benefit from soaking in warm water before planting.
A Few Final Tips
- Sterilize old plastic trays, individual pots, and tools with a bleach solution (1 part bleach to 9 parts water) before reusing to avoid spreading fungal diseases.
- Keep a notebook recording which seeds performed well, what growing medium you used, and any changes you’ll make next year.
- Don’t stress if some seeds fail. Seeds from year to year can have variable germination rates, especially if stored improperly.
With a little practice and patience, indoor seed starting can become one of your favorite spring traditions. Whether you’re growing vegetable plants for your kitchen or annual flowers for your yard, you’ll love the satisfaction of growing your own plants from seed.
References
Iowa State University. How to Successfully Start Seed Indoors.
The Seasonal Homestead. Indoor Seed Starting Guide + What No One Tells You!

