If you’re looking for an eco-friendly way to make use of your fresh grass clippings and yard waste, turning them into mini hay bales is a fantastic idea. Not only is it a great way to recycle lawn clippings for fall decorations, but it’s also a good hay source for small animals like miniature horses, miniature donkeys, chickens, and even guinea pigs.
Here’s how we use leftover twine from our baler and square kitty litter pails to create compact, mini hay bales that can be used as animal feed or compost.
While we do have tractors, a hay rake, baler with a kicker, and hay racks to make a lot of hay on our 200 acre farm. We still think it is practical to use as many resources on our farm as possible.
You don’t need a tractor and big farm equipment to make hay, it’s extremely easy to do on your own. All you need is access to grass and somewhere to dry and store it. It’s a budget-friendly DIY as grass is in many places a free resource.
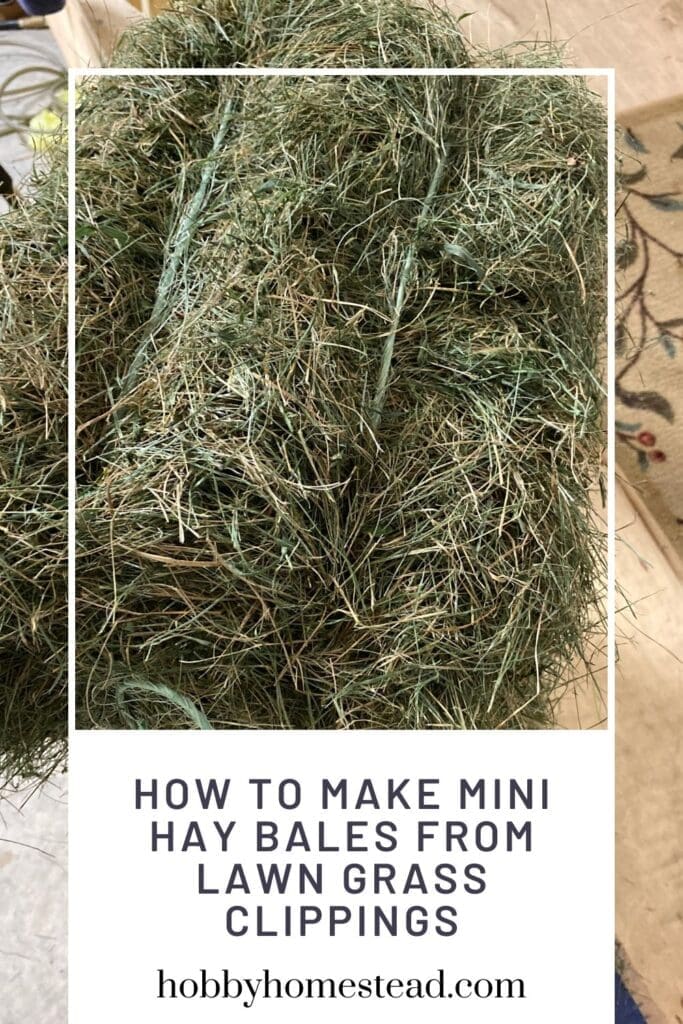
Table of contents
- Why Make Mini Hay Bales?
- How to Make Mini Hay Bales from Lawn Grass Clippings: A Simple and Eco-Friendly Guide
- Steps to Make Mini Hay Bales
- Collect Fresh Grass Clippings
- Dry the Grass Clippings
- Pack and Compress the Clippings
- Secure with Twin
- Store the Hay Bales
- Making Mini Hay Bales Video Tutorial
- Best Practices for Making Mini Hay Bales
- Mini Hay Bale Planters
- Benefits of Using Mini Hay Bales as Planters
- Benefits of Mini Hay Bales
- Safety Tips
- Mini Hay Bales
Why Make Mini Hay Bales?
Many people think that fresh lawn clippings aren’t good for animal feed. However, with proper preparation, you can create high-quality hay bales from lawn grass that provide organic matter and a nutritious food source for your animals. It’s also a great way to reduce waste and manage your yard responsibly by transforming cut grass into something useful.
How to Make Mini Hay Bales from Lawn Grass Clippings: A Simple and Eco-Friendly Guide
Materials Needed
- Lawn mower or a riding mower.
- Lawn rake or grass catcher on the mower.
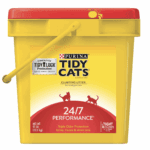
- Two pails or other containers. We use square kitty litter pails.
- Leftover twine from a baler
- Fresh grass clippings from your yard (free from fertilizers and pesticides)
- A dry area for curing the grass
- Optional: A pine straw baler (for small-scale hay baling)

Steps to Make Mini Hay Bales
Collect Fresh Grass Clippings
Use your lawn mower or riding mower to cut your grass. Rake the grass or use a grass catcher attached to your mower to collect fresh grass clippings. Regular mowing helps ensure smaller pieces, which are easier to handle and dry.
Avoid gathering wet grass as this can lead to mold in your hay bales. If you have a mixture of timothy or orchard grass in your yard, that’s even better as it creates a more diverse food source for animals.
Dry the Grass Clippings
Spread the fresh lawn clippings in a thin layer across a dry, sunny area. This allows the clippings to dry thoroughly, turning them into dry clippings suitable for bales. Depending on your climate, this may take a few days.
For the best results, be sure to choose a day or two when there’s no rain in the forecast.
Let the grass dry one day. Then flip the clippings to ensure even drying. We use a rake to get the grass in rows on the second day.
Pack and Compress the Clippings
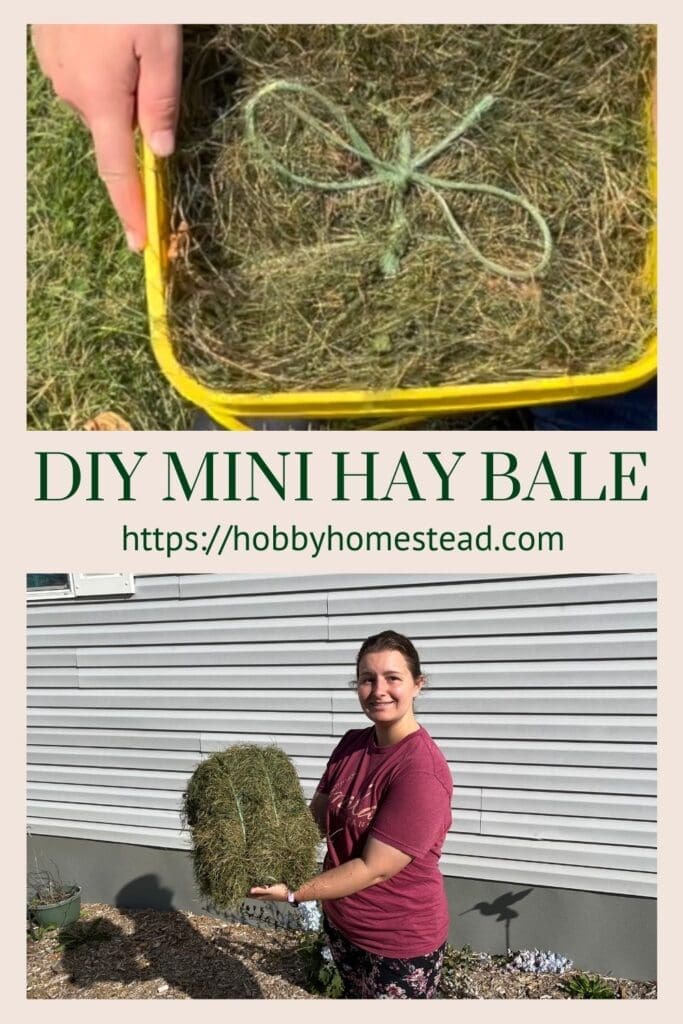
Once your clippings have dried, it’s time to make your mini bales. Put two pieces of binder twine in the bottom of one pail with enough hanging out the top to tie together later.
We use two square kitty litter pails. Pack the pail with the twine in the bottom of it with the dry grass. We use the empty pail to compress the clippings. You can also use your hands or feet to compress the clippings tightly into the container. The tighter you pack the clippings, the more stable your hay bale will be.
Secure with Twin
Tie the twine ends together around the baled clippings. Remove the tightly packed grass from the container. Double check that the twine is secure so that the hay bale doesn’t fall apart.
Store the Hay Bales
Store the hay bales in a dry, well-ventilated area to prevent moisture buildup, which could cause mold.
Hay bales can last a long time if stored properly, making them a great resource for both decorations and animal feed.
Making Mini Hay Bales Video Tutorial
See us making our mini hay bales on our YouTube Channel from our grass clippings.
Best Practices for Making Mini Hay Bales
Drying. Ensuring your grass clippings are thoroughly dry is one of the most important steps. Wet grass can cause mold, which makes hay unsafe for animal consumption.
Regular Mowing. Regular mowing produces smaller amounts of clippings and little pieces, which dry more quickly and easily. A mulching mower is also a great way to break down clippings for better drying.
Storing Mini Hay Bales. While these can be used for both decorative purposes and animal feed, it’s a good idea to store the bales in clean areas. Keep them free from contamination.
Compost Pile Use. If you’re not using all your mini hay bales for animal feed, they make a fantastic addition to your compost pile. The organic matter in the hay can improve your soil surface and help reduce weed growth.
Mini Hay Bale Planters
This is a creative and eco-friendly way to repurpose them, especially if you’re into gardening or looking for a zero-waste solution. Here’s how you can use your mini hay bales as planters.
How to Use Mini Hay Bales as Planters
Choose a Spot. Place your mini hay bales in a sunny area with good drainage. The bales can be positioned directly on the ground or on a raised surface, depending on where you plan to grow your plants.
Prepare the Bales. Water the mini hay bales thoroughly for a few days to start the decomposition process. This makes the inside of the bale soft and nutrient-rich for planting. You may also want to add some organic matter, compost, or soil on top to improve the growing conditions.
Plant Seeds or Seedlings. Once the bales are prepped, you can either plant seeds directly into the bales or transplant seedlings. Just create small holes in the top or sides of the hay bale, place your plants in, and cover them lightly with soil or compost.
Watering and Maintenance. Keep the hay bale planter well-watered, especially in the early stages, as hay tends to dry out quickly. Over time, the decomposition of the hay will provide additional nutrients for your plants.
Benefits of Using Mini Hay Bales as Planters
Nutrient-Rich Growing Medium. As the hay breaks down, it turns into organic matter, which enriches the soil surface and creates a fertile environment for your plants.
Weed Suppression. The compact nature of the mini hay bales helps suppress weed growth around the base of your plants, making maintenance easier.
Eco-Friendly and Sustainable. Using hay bales as planters is an eco-friendly way to recycle yard waste and fresh grass clippings, reducing the need for plastic pots or other non-sustainable materials.
Great for Small Spaces. Mini hay bale planters are ideal for small-scale gardening, such as container gardens or urban spaces where traditional garden beds may not be practical.
Portable and Versatile. You can easily move mini hay bale planters around your yard to optimize sunlight or shift them as needed, unlike heavy soil beds.
Using mini hay bales as planters offers a unique, sustainable gardening option and gives you yet another way to put your fresh clippings and yard waste to good use.

Benefits of Mini Hay Bales
Eco-Friendly. Reusing yard waste like fresh clippings from your lawn helps reduce the amount of waste going to landfills. It’s an eco-friendly way to keep your yard tidy while providing a useful food source for animals.
Feed for Animals. Mini hay bales made from organic fresh clippings can provide unlimited access to food for small animals like guinea pigs, chickens (nest boxes), or larger animals like miniature horses.
Decoration and Practical Use. Mini hay bales are perfect for seasonal decorations around the home, and when you’re done, they can be composted or fed to animals, reducing waste.
Cost-Effective. You don’t need to buy expensive equipment from various merchants or pet stores to make hay bales on a small scale. With just a few simple items, like twine and plastic bags, you can make good hay for your animals and yard.
Safety Tips
If you’re using any equipment like a lawn mower or pine straw baler, be sure to follow safety instructions. Always wear protective gear and keep an eye on the equipment operator to prevent any accidents.
Working with fresh grass clippings also means you’ll want to avoid storing them in plastic bags or tight containers without drying them first, to prevent mold buildup.
How to Make Mini Hay Bales from Lawn Grass Clippings
As an Amazon Associate I earn from qualifying purchases.
Equipment
Materials
- Fresh grass clippings from your yard free from fertilizers and pesticides
Instructions
- Collect Fresh Grass Clippings. Use your lawn mower or riding mower to cut your grass. Rake the grass or use a grass catcher attached to your mower to collect fresh grass clippings. Regular mowing helps ensure smaller pieces, which are easier to handle and dry.Fresh grass clippings from your yard
- Avoid gathering wet grass as this can lead to mold in your hay bales. If you have a mixture of timothy or orchard grass in your yard, that’s even better as it creates a more diverse food source for animals.
- Dry the Grass Clippings. Spread the fresh lawn clippings in a thin layer across a dry, sunny area. This allows the clippings to dry thoroughly, turning them into dry clippings suitable for bales. Depending on your climate, this may take a few days.
- For the best results, be sure to choose a day or two when there’s no rain in the forecast.
- Let the grass dry one day. Then flip the clippings to ensure even drying. We use a rake to get the grass in rows on the second day.
- Pack and Compress the Clippings. Once your clippings have dried, it’s time to make your mini bales. Put two pieces of binder twine in the bottom of one pail with enough hanging out the top to tie together later.
- We use two square kitty litter pails. Pack the pail with the twine in the bottom of it with the dry grass. We use the empty pail to compress the clippings. You can also use your hands or feet to compress the clippings tightly into the container. The tighter you pack the clippings, the more stable your hay bale will be.
- Secure with Twin. Tie the twine ends together around the baled clippings. Remove the tightly packed grass from the container. Double check that the twine is secure so that the hay bale doesn’t fall apart.
- Store the Hay Bales. Store the hay bales in a dry, well-ventilated area to prevent moisture buildup, which could cause mold.
- Hay bales can last a long time if stored properly, making them a great resource for both decorations and animal feed.
Notes

Mini Hay Bales
Making mini hay bales from fresh lawn clippings is a great way to make use of yard waste and reduce your environmental impact.
It’s one of the best things you can do to turn a pile of grass clippings into a useful food source for animals or an addition to your compost pile. With proper drying techniques and a few simple tools, you’ll have hay bales ready in no time.


Thanks for this information.
We use this method and it works.