Your grandmother knew Kitchen Skills Every Homemaker Should Know. She used tricks that made cooking easier, cheaper, and less wasteful. These timeless skills still outperform modern shortcuts every single time.
Modern conveniences promised easier cooking, but they can’t replace these essential techniques. Master them once and save money for years to come.
Your grandmother never needed to Google how to make dinner.
Skilled Passed Down Through Generations
She could walk into a kitchen with flour, butter, and whatever vegetables were in season and create a meal that fed the whole family. She knew how to make bread rise, how to tell when jam was ready, and how to stretch leftovers into something delicious. These weren’t special talents. They were everyday skills passed down through generations.
Today, many of those practical techniques have been replaced by convenience foods and online tutorials. But the knowledge itself hasn’t lost its value. Learning to measure ingredients properly, preserve seasonal harvests, and cook from scratch builds confidence, saves money, and reduces waste in ways that modern shortcuts simply can’t match.
The best part? These skills aren’t complicated once you understand the basics.

Table of contents
- 1. Measuring Ingredients the Right Way
- 2. Reading a Recipe Before You Start
- 3. Basic Knife Skills That Make Everything Easier
- 4. Making Do with What You Have
- 5. Using Leftovers Creatively
- 6. Stretching Meals Without Sacrificing Flavor
- 7. Cooking Without Frequent Grocery Trips
- 8. Learning to Cook with the Seasons
- 9. Cooking From Scratch Without Fear
- 10. Preserving Food for Later Use
- Reducing Kitchen Waste
Building Confidence in the Kitchen
These foundational skills help every homemaker feel more comfortable and successful in the kitchen. They may seem simple, but they prevent mistakes, save time, and improve results.
1. Measuring Ingredients the Right Way
Most baking failures start before the oven even turns on.
When measurements are off, recipes fail. Too much flour makes biscuits dense. Too little sugar throws off the texture of cakes.
The difference between a perfect batch and a frustrating flop often comes down to how ingredients were measured in the first place. Grandma knew this instinctively. She understood that precision matters, especially in baking where chemistry takes over.
Why It Matters
- Accurate baking results
- Consistent recipes
- Less frustration
Here’s what makes measuring accurate:
- Use dry measuring cups for flour, sugar, and other dry ingredients. These cups are designed to be filled to the brim and leveled off with a straight edge. Liquid measuring cups have extra space at the top and won’t give you the right amount.
- Use liquid measuring cups for milk, oil, water, and other liquids. Set the cup on a flat surface and read the measurement at eye level. Looking down from above creates errors.
- Spoon and level flour instead of scooping directly from the bag. Scooping compacts the flour and adds up to 25% more than the recipe calls for. Spoon it lightly into the cup, then level it off.
- Pack brown sugar firmly into the measuring cup. It should hold its shape when turned out. This is one of the few ingredients that requires packing.
- Invest in a simple kitchen scale if you bake often. Weighing ingredients eliminates guesswork entirely and is how professional bakers work.
These small differences add up fast. A tablespoon here, a misread cup there, and suddenly your bread won’t rise or your cookies spread too thin. Measuring correctly is one of the easiest ways to improve your results immediately.
2. Reading a Recipe Before You Start
Experienced cooks never dive straight into step one.
They read the entire recipe first, check what’s needed, and prepare everything before turning on the stove. This habit prevents mid-recipe surprises like realizing you’re missing an ingredient or discovering a step requires chilling dough overnight.
It’s the difference between smooth cooking and scrambling to fix problems while the pan is already hot.
Before you start cooking, do this:
- Read the full ingredient list. Make sure you have everything or know what substitutions you can make.
- Check the equipment required. If a recipe calls for a stand mixer and you only have a hand mixer, you need to know that upfront.
- Look for unfamiliar terms or techniques. Words like “fold,” “blanch,” or “temper” have specific meanings. Understanding them before you start saves confusion later.
- Prep your ingredients ahead of time. Chop vegetables, measure spices, and bring butter to room temperature before cooking begins. This is called mise en place, and it makes everything easier. Professional Chefs use this method all the time. It’s one of the first things we teach our culinary students.
This one habit transforms cooking from stressful to manageable. You’ll move through recipes faster, make fewer mistakes, and actually enjoy the process instead of feeling rushed or overwhelmed.
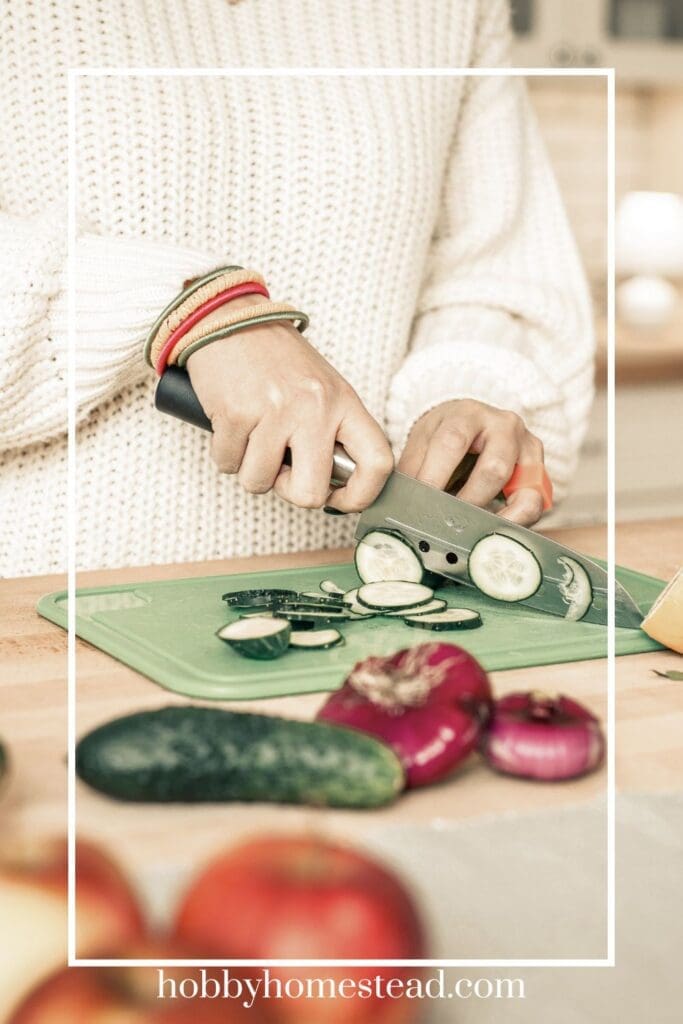
3. Basic Knife Skills That Make Everything Easier
A sharp knife is safer than a dull one.
That sounds backward, but it’s true. Dull knives require more pressure, slip more easily, and cause more accidents. A sharp blade cuts cleanly with minimal force, giving you better control and faster prep times.
But sharpness alone isn’t enough. You also need to know how to hold the knife, how to position your hands, and how to make basic cuts without risking your fingers.
Start with these fundamentals:
- Hold the knife with a pinch grip. Pinch the blade between your thumb and forefinger where it meets the handle. Wrap your other fingers around the handle. This gives you control and precision.
- Use the claw grip with your non-knife hand. Curl your fingers inward like a claw and rest your knuckles against the blade. This protects your fingertips while guiding the knife.
- Learn to dice, chop, and slice. Dicing creates small, uniform cubes. Chopping is rougher and faster. Slicing produces thin, even pieces. Each technique has a purpose.
- Keep your knives sharp. Use a honing steel regularly and sharpen your knives a few times a year. Sharp knives make prep faster and safer.
Good knife skills speed up every recipe. Vegetables cook more evenly when they’re cut the same size. Prep time drops in half once you’re comfortable with a blade. And you’ll avoid the frustration of mangled tomatoes, crushed garlic, and uneven onion pieces that burn in the pan.
Once you have the basics mastered, the next step is learning how to cook resourcefully with the ingredients you already have on hand.
Learning to Cook Resourcefully
Grandma didn’t rely on convenience foods or quick trips to the grocery store. She learned to use what she had, waste very little, and make meals stretch further.
4. Making Do with What You Have
Running to the store for one missing ingredient isn’t always realistic.
Grandma didn’t have that option. She worked with what was in the pantry, the garden, and the root cellar. That mindset forced creativity and taught her how to substitute, stretch, and adapt recipes on the fly.
The result? Less waste, fewer trips to the store, and meals that still turned out great. You can do the same thing once you understand which swaps work and which don’t.
This is one of the most valuable homestead skills you can develop. When you know how to make substitutions confidently, you stop depending on perfect conditions to cook a good meal.
You work with what’s available, what’s in season, and what needs to be used up before it spoils. That’s how grandma kept her grocery bills low and her family fed even when money was tight or the garden hadn’t come in yet.
Ingredient Substitutions That Actually Work
Not every substitution works, but many do. The key is understanding what role an ingredient plays in a recipe. Is it there for moisture? Structure? Flavor? Leavening? Once you know that, you can figure out what else might do the same job. Here are the most reliable swaps that won’t ruin your cooking:
- Applesauce for oil in baking. Use a 1:1 ratio. It cuts fat, adds moisture, and keeps cakes and muffins tender. Best in recipes where a little apple flavor won’t hurt.
- Plain yogurt for sour cream. Greek yogurt works perfectly in dips, dressings, baked goods, and even as a topping. Same tangy flavor, same creamy texture.
- Buttermilk substitute using milk and vinegar. Add one tablespoon of white vinegar or lemon juice to a cup of regular milk. Let it sit for five minutes and it’ll thicken slightly and turn tangy, just like buttermilk.
- Homemade breadcrumbs from stale bread. Toast the bread until it’s dry and crisp, then pulse it in a blender or food processor. You’ve just saved money and used up something that would’ve been thrown out.
- Honey or maple syrup for sugar. In some recipes, you can swap liquid sweeteners for granulated sugar. Reduce the other liquids slightly to compensate. Works best in quick breads, marinades, and sauces.
- Crushed crackers or oats for breadcrumbs. If you don’t have stale bread, use what you do have. Crushed saltines, Ritz crackers, or rolled oats all work as binders in meatloaf, meatballs, and casseroles.
These substitutions give you flexibility. You don’t need to run to the store every time you’re missing one ingredient. You learn to think like grandma did: what can I use instead that will still work?
Herbs and Produce
- Fresh herbs for dried, or vice versa. Use three times as much fresh herb as dried. Dried herbs are more concentrated. If a recipe calls for one tablespoon of fresh basil, use one teaspoon of dried.
- Broth made from vegetable scraps instead of store-bought. Save onion peels, carrot tops, celery leaves, and herb stems in a freezer bag. When it’s full, simmer the scraps in water for an hour, strain, and you’ve got free broth.
5. Using Leftovers Creatively
Grandma never threw out food just because it had been cooked once already. Leftovers weren’t sad reheated meals. They were the foundation for tomorrow’s dinner.
A roasted chicken became chicken soup, then chicken salad, then stock from the bones. Mashed potatoes turned into potato cakes. Stale bread became stuffing, breadcrumbs, or French toast.
This kind of thinking stretches your grocery budget further than almost anything else. Instead of cooking from scratch every single night, you’re building meals on top of what you’ve already made.
It takes planning, but not much. Just a willingness to see leftovers as ingredients, not waste.
Here’s how to use leftovers without getting bored:
- Turn roasted vegetables into soup. Blend them with broth and seasonings. Add cream or coconut milk if you want it richer. Top with croutons or fresh herbs.
- Use leftover rice in fried rice, casseroles, or stuffed peppers. Cold rice actually works better for fried rice because it’s drier and won’t get mushy in the pan.
- Shred leftover meat for tacos, sandwiches, or salads. Roast beef, pork, chicken, turkey—it all works. Add fresh toppings and a good sauce and it feels like a completely different meal.
- Make a kitchen sink frittata. Eggs, leftover vegetables, cheese, cooked potatoes, bits of ham or sausage. Mix it all together, bake it, and you’ve got breakfast, lunch, or dinner.
- Turn stale bread into croutons, bread pudding, or stuffing. Cube it, toss it with butter and seasonings, and bake until crispy. Or soak it in a custard mixture and bake it sweet or savory.
- Stretch soups and stews by adding grains or pasta. A pot of soup that serves four can serve six if you add rice, barley, or noodles. Bulk it up with what you have on hand.
The more you practice this, the more natural it becomes. You’ll start planning meals around what needs to be used up. You’ll see opportunities instead of obligations. And you’ll waste far less food, which saves money and feels good.
6. Stretching Meals Without Sacrificing Flavor
Stretching a meal doesn’t mean watering it down. It means using smart techniques to make a little go further without anyone noticing.
Grandma did this constantly. She’d make a pound of ground beef feed eight people by adding oats, vegetables, and broth. She’d turn one chicken into three meals. She knew how to bulk up dishes with affordable staples that added nutrition and kept everyone full.
Ways to stretch meals that actually work:
- Add beans or lentils to ground meat dishes. Mix cooked lentils or black beans into tacos, spaghetti sauce, or chili. They add protein, fiber, and bulk without changing the flavor much.
- Use oats or breadcrumbs as a binder and extender. In meatloaf, meatballs, and burgers, these ingredients absorb moisture and make the meat go further. You’ll get more servings from the same amount of meat.
- Serve meals over rice, pasta, or potatoes. A small amount of stew or curry becomes a full meal when served over a starch. The starch soaks up the sauce and makes the dish more filling.
- Make casseroles instead of standalone proteins. Casseroles combine protein, vegetables, and starch into one dish. A little chicken or ground beef mixed with pasta, rice, or potatoes feeds more people than serving the meat alone.
- Use bone-in cuts and render every bit of value. A whole chicken costs less per pound than breasts. Roast it, eat the meat, then simmer the carcass for stock. You’ve now made two or three meals from one chicken.
Stretching meals isn’t about deprivation. It’s about being smart with your ingredients and making sure nothing goes to waste. When you learn to do this well, you’ll be shocked at how much further your grocery budget goes.
7. Cooking Without Frequent Grocery Trips
When you can’t run to the store every few days, you learn to cook with what’s already in the house. This requires a mindset shift.
Instead of planning meals and then shopping for ingredients, you’re looking at your pantry and figuring out what you can make. It’s a skill that takes practice, but once you get good at it, you’ll feel more confident and way less dependent on constant grocery runs.
How to cook successfully from what you have:
- Keep a well-stocked pantry with basics. Flour, sugar, salt, rice, pasta, beans, canned tomatoes, broth, oil, and basic spices. With these staples, you can make dozens of meals.
- Learn a handful of flexible recipes. Soup, stir-fry, casseroles, fried rice, pasta dishes. These are templates that work with almost any vegetables, proteins, or leftovers you have on hand.
- Grow or preserve what you can. A garden, even a small one, gives you fresh produce without a store trip. Canning, freezing, and dehydrating extend the harvest so you can use it months later.
- Get comfortable with simple meals. Beans and rice. Eggs and toast. Pancakes for dinner. These aren’t fancy, but they’re nourishing, cheap, and require only pantry staples.
- Plan meals around what needs to be used first. Check what’s in the fridge, what vegetables are getting soft, what meat is closest to its date. Build your meals around those things instead of starting from a recipe.
This approach reduces food waste, saves money, and makes you a more resourceful cook. It’s exactly how grandma managed to put dinner on the table night after night without running to the store every time she needed an ingredient.
One reason previous generations were able to cook so resourcefully was because they understood the rhythm of the seasons and planned their kitchens around it.
8. Learning to Cook with the Seasons
Understanding Seasonal Cooking
Before supermarkets carried strawberries in January and tomatoes year-round, families cooked with whatever was naturally available. Seasonal cooking wasn’t a trend—it was simply how people ate.
Grandma knew when certain foods would be plentiful, when they needed preserving, and how to make use of what each season provided.
Spring
Spring kitchens focused on fresh, tender foods after a long winter.
Common spring foods included:
- Lettuce
- Spinach
- Asparagus
- Radishes
- Green onions
- Fresh eggs
Meals tended to be lighter and featured the first harvests from the garden.
Summer
Summer brought abundance.
Common summer foods included:
- Tomatoes
- Cucumbers
- Green beans
- Sweet corn
- Peppers
- Berries
This was also peak preserving season. Families canned tomatoes, made jams, froze vegetables, and dehydrated herbs for winter use.
Fall
Fall focused on harvest and preparation.
Common fall foods included:
- Apples
- Winter squash
- Pumpkins
- Potatoes
- Carrots
- Beets
Hearty soups, baked goods, and preservation projects filled the kitchen.
Winter
Winter relied heavily on stored foods.
Families cooked with:
- Root vegetables
- Dried beans
- Rice
- Flour
- Frozen produce
- Home-canned goods
Meals were simple, filling, and designed to stretch pantry supplies until spring returned.
Why Seasonal Cooking Still Matters
Cooking seasonally:
- Saves money
- Supports local farmers
- Reduces food waste
- Improves flavor
- Connects families to the natural growing cycle
It’s one of the most practical old-fashioned skills worth rediscovering.
Seasonal cooking naturally leads to another traditional skill: preserving food when it’s abundant so you can enjoy it throughout the year.
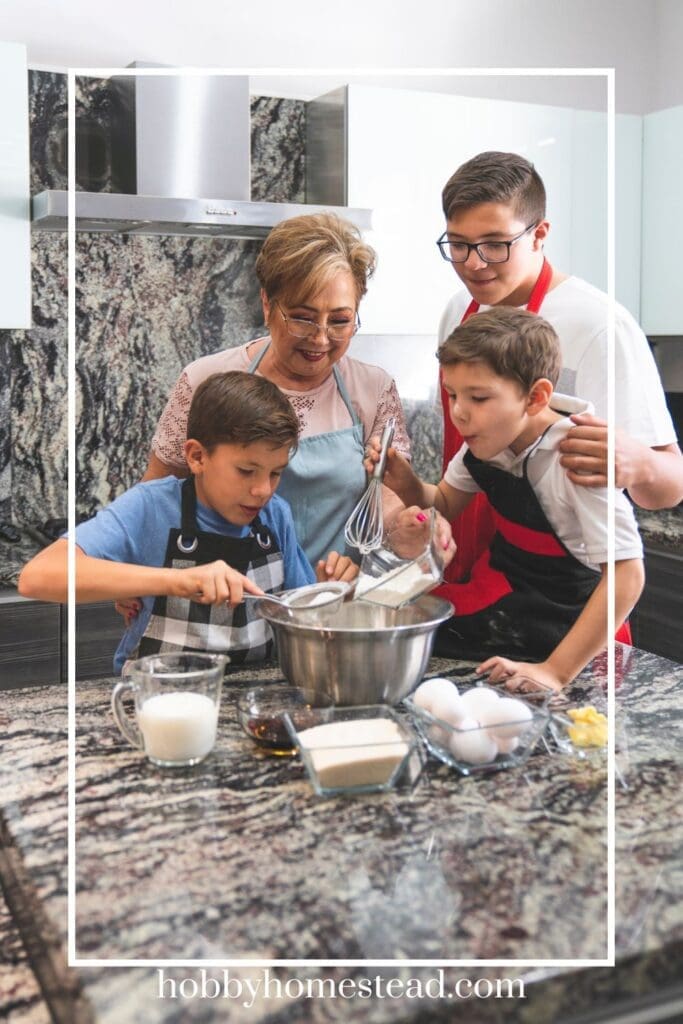
9. Cooking From Scratch Without Fear
Self-Sufficiency Skills Every Homemaker Should Know
Homemade doesn’t have to mean complicated.
Many people avoid cooking from scratch because they think it requires advanced skills or hours of time. But the truth is, basic recipes like biscuits, pancakes, and simple sauces are faster and easier than most people realize.
Grandma made these things daily not because she had extra time, but because they were practical, affordable, and didn’t require a trip to the store.
A wonderful old-fashioned skill.
Opening a box mix feels convenient, but it’s more expensive and less flexible than baking from scratch. Grandma never bought mixes because she didn’t need them.
She understood the basic formulas for cakes, muffins, biscuits, and cookies. Once you know those formulas, you can bake almost anything without a box and customize it however you want.
Baking from scratch means you control the ingredients. No preservatives, artificial flavors, or unpronounceable chemicals. Just flour, fat, sugar, eggs, and leavening. These pantry staples cost less than mixes and make better-tasting baked goods every time.
Basic baking formulas you should know:
- Biscuits: Flour, fat (butter or shortening), milk, baking powder, salt. Cut the fat into the flour, add milk, mix gently, cut, and bake. Takes ten minutes of work.
- Muffins: Flour, sugar, eggs, milk, oil or melted butter, baking powder, salt. Mix wet and dry ingredients separately, combine gently, bake. Add fruit, nuts, or chocolate chips for variety.
- Quick breads: Similar to muffins but baked in a loaf pan. Banana bread, zucchini bread, and pumpkin bread all follow the same basic formula.
- Cookies: Butter, sugar, eggs, flour, baking soda or powder, salt. Cream the butter and sugar, add eggs, mix in dry ingredients, bake. Add chocolate chips, oats, or nuts.
- Cakes: Flour, sugar, eggs, butter, milk, baking powder, salt, vanilla. Cream butter and sugar, add eggs, alternate adding dry ingredients and milk, bake. Frost or leave plain.
- Pie crusts: Flour, fat (butter, shortening, or lard), cold water, salt. Cut the fat into the flour until it looks like coarse crumbs, add just enough water to hold it together, roll out, and bake.
Once you understand these formulas, you can make countless variations. Add spices, swap out flours, use honey instead of sugar, mix in dried fruit or nuts.
Baking from scratch gives you control, saves money, and tastes better than anything from a box.
Start with these beginner-friendly staples:
- Homemade biscuits. Flour, butter, milk, and baking powder. Mix, cut, bake. Ten minutes of hands-on time.
- Pancakes from scratch. Easier than opening a box mix and tastes better. No weird additives.
- Simple soups and broths. Throw vegetables, herbs, and bones into a pot. Simmer. Strain. Done.
- Basic gravies and sauces. Fat, flour, and liquid. That’s the formula. Everything else is just flavor.
- Homemade bread. Yeast, flour, water, salt. It takes time to rise, but the actual work is minimal.
What each ingredient does in baking:
- Flour gives structure. It contains gluten, which forms a network that holds baked goods together. Too much flour makes things dense. Too little makes them fall apart.
- Fat makes things tender. Butter, oil, and shortening coat flour proteins and prevent them from forming too much gluten. This creates tender, flaky, or moist textures.
- Sugar sweetens, but it also affects texture. It makes baked goods tender, helps them brown, and retains moisture. Cutting sugar changes more than just sweetness.
- Eggs bind ingredients, add moisture, and help things rise. They also add richness and color. You can sometimes substitute flax eggs or applesauce, but results vary.
- Baking powder and baking soda are leavening agents. They create air bubbles that make baked goods rise. Baking soda needs an acid (like buttermilk or brown sugar) to work. Baking powder has acid built in.
- Salt enhances flavor. Even in sweet recipes, a pinch of salt makes everything taste better. It balances sweetness and brings out other flavors.
- Liquids hydrate dry ingredients and create steam. Milk, water, juice, or buttermilk all add moisture and help ingredients come together.
When you understand how ingredients work, you’re no longer dependent on recipes. You can make adjustments, fix mistakes, and bake with confidence no matter what’s in your pantry.
The more you practice, the more confident you become. And confidence in the kitchen leads to better meals, lower grocery bills, and the ability to feed your family even when the pantry looks bare.
10. Preserving Food for Later Use
Fresh food doesn’t last forever, but preserved food can.
Before freezers and year-round grocery stores, preserving food was essential. Grandma canned tomatoes in the summer so she’d have them in January. She dehydrated herbs and fruits.
She knew how to ferment vegetables and pressure-can meat. These techniques weren’t hobbies. They were survival skills that ensured her family ate well all year long.
Common preservation methods you can start using today:
- Freezing. The easiest option. Blanch vegetables first, cool them quickly, and freeze in airtight bags. Label everything with dates.
- Dehydrating. Great for herbs, fruits, and jerky. Use a dehydrator or a low-temperature oven.
- Water bath canning. For high-acid foods like jams, pickles, and tomatoes. Requires a large pot and proper jars.
- Pressure canning. Necessary for low-acid foods like vegetables, meat, and beans. Requires a pressure canner and careful attention to safety.
- Fermenting. Sauerkraut, pickles, and kimchi are all fermented. The process preserves food and adds probiotics.
Preserving food saves money and reduces waste. You can buy produce in season when it’s cheap and abundant, then preserve it for months.
You’ll also avoid the frustration of watching fresh food spoil because you couldn’t use it fast enough. These methods take practice, but they’re worth learning.
Storing Food Correctly
Many people lose food simply because it isn’t stored properly.
Produce goes bad faster than it should. Pantry staples get stale or infested. Freezer items develop freezer burn. Grandma understood that proper storage wasn’t just about putting things away. I
t was about knowing which foods needed cool, dark spaces, which ones lasted longer in the fridge, and how to keep pests out of dry goods. She labeled everything, rotated stock, and never wasted food because she forgot it was there.
Good storage habits save money and reduce waste. When you store food correctly, it lasts longer, tastes better, and stays safe to eat. You’ll throw out less, shop less often, and always know what you have on hand.
Pantry Organization
A well-organized pantry makes cooking easier and prevents waste. When you can see what you have, you’re less likely to buy duplicates or let things expire in the back of a shelf.
Grandma kept her pantry organized not because she was obsessive, but because it was practical. She knew exactly where everything was and what needed to be used up next.
How to organize your pantry effectively:
- Group similar items together. Baking supplies in one area, canned goods in another, grains and pasta somewhere else. This makes it easy to find what you need and see when you’re running low.
- Use clear containers for dry goods. Transfer flour, sugar, rice, oats, and beans into airtight containers. You’ll see exactly how much you have left, and it keeps pests out.
- Label everything with the date you opened it or the expiration date. A piece of masking tape and a marker is all you need. This helps you use older items first.
- Keep the oldest items in front. When you buy new flour, rice, or canned goods, put them behind what’s already there. Use up the older stock first.
- Store pantry staples in a cool, dark, dry place. Heat, light, and moisture make food spoil faster. A pantry or cupboard away from the stove works best.
An organized pantry saves time and money. You’ll know what you have, what you need, and what’s about to expire. You’ll waste less and cook more efficiently.
Root Vegetables
Root vegetables like potatoes, onions, carrots, beets, and winter squash can last for months if stored correctly. Grandma kept these in a root cellar, but you don’t need a cellar to make it work. You just need a cool, dark, dry space with good air circulation.
How to store root vegetables so they last:
- Keep potatoes in a cool, dark place. Light makes them turn green and develop a bitter, toxic compound. A paper bag or cardboard box in a pantry, basement, or garage works well.
- Store onions and garlic in a dry, well-ventilated area. Mesh bags or wire baskets allow air to circulate. Don’t store them in plastic, which traps moisture and causes rot.
- Keep potatoes and onions separate. Onions release gases that make potatoes sprout faster.
- Brush off dirt but don’t wash root vegetables before storing. Washing adds moisture, which shortens shelf life. Clean them right before you use them.
- Check stored vegetables regularly. Remove any that are starting to rot so they don’t spoil the rest.
With proper storage, root vegetables can last from several weeks to several months. That means fewer grocery trips and less waste.
Refrigeration Basics
Not everything belongs in the fridge, and not all parts of the fridge are the same temperature. Grandma didn’t have a huge refrigerator, so she was strategic about what went in it and where. Understanding how your fridge works helps you store food correctly and keep it fresh longer.
Refrigeration tips that prevent waste:
- Store dairy and eggs on a shelf, not in the door. The door is the warmest part of the fridge because it’s exposed to room temperature every time you open it. Dairy and eggs need consistent cold.
- Keep raw meat on the bottom shelf in a container. If it leaks, it won’t drip onto other food and cause contamination.
- Store herbs like flowers. Trim the stems, place them in a jar of water, and cover loosely with a plastic bag. They’ll stay fresh for a week or more.
- Wrap cheese in wax paper or parchment, not plastic wrap. Cheese needs to breathe. Plastic traps moisture and makes it slimy.
- Don’t refrigerate tomatoes, potatoes, onions, garlic, or bread. Cold temperatures ruin their texture and flavor. Store these at room temperature instead.
Proper refrigeration keeps food fresh, safe, and tasty. It also prevents you from throwing out things that went bad too soon.
Freezer Storage
A freezer is one of the best tools for preserving food, but only if you use it correctly. Grandma understood that freezing isn’t just about tossing things in and hoping for the best. You need to package food properly, label everything, and know how long different items last.
How to store food in the freezer without ruining it:
- Use airtight containers or freezer bags. Regular plastic bags aren’t thick enough. Freezer bags are designed to prevent freezer burn and protect food from absorbing odors.
- Remove as much air as possible before sealing. Air causes freezer burn, which dries out food and ruins texture. Press the air out of bags or use a vacuum sealer.
- Label everything with the contents and date. Frozen food doesn’t look like much after a few weeks. You won’t remember what it is or when you froze it unless you write it down.
- Freeze food flat for easy storage. Lay bags flat on a baking sheet until frozen, then stack them upright. They take up less space and thaw faster.
- Blanch vegetables before freezing. Blanching stops enzyme activity that causes vegetables to lose color, flavor, and nutrients. Boil them briefly, plunge them into ice water, drain, and freeze.
- Don’t freeze eggs in the shell. They’ll crack. Crack them into a container, beat lightly, and freeze. Or freeze just the whites or yolks separately.
- Use frozen food within recommended time frames. Most vegetables last 8-12 months. Meat lasts 3-12 months depending on the type. Baked goods last 2-3 months. After that, food is still safe but quality declines.
Freezer storage extends the life of food by months. It’s perfect for preserving garden harvests, storing leftovers, and buying in bulk when prices are low.
Labeling Dates
If you don’t label it, you’ll forget when you made it, bought it, or opened it. Grandma labeled everything. Canning jars, freezer bags, pantry containers—all of it got a date. This simple habit prevents waste and keeps you from eating food that’s past its prime.
Why labeling matters and how to do it:
- Write the date on everything you freeze. Use a permanent marker directly on freezer bags or masking tape on containers. Include what it is and when you froze it.
- Label opened pantry items. Flour, sugar, oats, and other staples don’t always get used up quickly. Knowing when you opened them helps you use them while they’re still fresh.
- Mark canning jars with the date and contents. Canned goods last a year or more, but you need to know what’s oldest so you can use it first.
- Rotate your stock based on dates. Newest items go to the back. Oldest items stay in front where you’ll grab them first.
Labeling takes five seconds and prevents hours of frustration.You’ll never again stare at a mystery container wondering if it’s safe to eat.
Reducing Kitchen Waste
One of the hallmarks of old-fashioned homemaking was using every resource wisely. Waste was avoided whenever possible, and creativity often turned scraps into something useful.
Grandma didn’t throw away food unless it was truly inedible. She saved vegetable scraps for broth, froze leftovers for later, composted what couldn’t be eaten, and found creative uses for everything from stale bread to chicken bones.
This wasn’t because she was frugal for fun. It was practical. Food cost money and effort to produce, and wasting it meant wasting both.
Reducing kitchen waste saves money, helps the environment, and makes you a more resourceful cook.
When you stop throwing things out reflexively and start asking “what can I do with this instead?” you’ll be surprised at how much less trash you produce and how much further your groceries stretch.
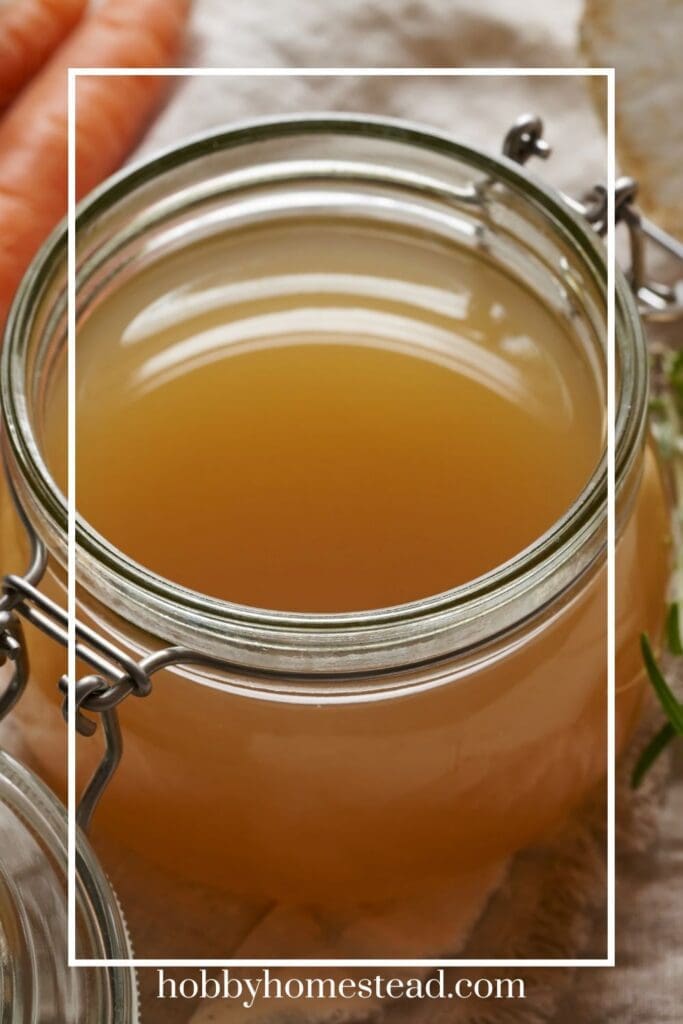
Saving Vegetable Scraps for Broth
Onion skins, carrot peels, celery leaves, herb stems, garlic skins, and the ends of vegetables don’t have to go in the trash.
They can become rich, flavorful broth for free. Grandma kept a bag in the freezer for scraps and when it was full, she’d simmer them into stock.
How to make broth from scraps:
- Keep a freezer bag for vegetable scraps. Toss in onion peels, carrot tops, celery leaves, parsley stems, mushroom stems, and the ends of zucchini, peppers, and tomatoes. Avoid cruciferous vegetables like broccoli and cabbage—they make broth bitter.
- When the bag is full, dump it into a pot. Add water to cover, bring to a boil, then simmer for an hour or more.
- Strain out the solids and use the broth immediately or freeze it. Use it in soups, stews, sauces, or anywhere a recipe calls for broth.
- Add bones for richer stock. Chicken bones, beef bones, or pork bones add depth and nutrition. Roast them first for even more flavor.
Homemade broth costs nothing but time. It tastes better than store-bought and uses up scraps that would’ve been thrown away.
Freezing Leftovers
Leftovers don’t have to be eaten the next day. If you’re tired of a dish or made too much, freeze it. Grandma did this constantly.
She’d freeze half a pot of soup, extra casserole portions, or cooked meat that wasn’t going to get used in time. Then, weeks later, she’d pull it out and have a ready-made meal with zero effort.
What freezes well and how to do it:
- Soups and stews. Cool completely, pour into freezer-safe containers or bags, label, and freeze. Leave a little headspace for expansion.
- Cooked grains and pasta. Portion them into bags, freeze flat, and reheat later for quick meals.
- Casseroles. Freeze before or after baking. If freezing before, assemble it in a freezer-safe dish, cover tightly, and bake from frozen (add extra time).
- Cooked meat. Slice, shred, or cube it first. Freeze in portions you’ll actually use.
- Baked goods. Muffins, quick breads, biscuits, and cookies all freeze well. Wrap individually for easy grab-and-go breakfasts or snacks.
Freezing leftovers prevents waste and gives you a stash of homemade convenience food. On nights when you’re too tired to cook, you’ll have something healthy and homemade ready to reheat.
Composting
What you can’t eat and can’t save can often be composted. Grandma composted everything from eggshells to coffee grounds to wilted lettuce. She’d turn it into rich soil for the garden, which grew more food, which created more scraps. It was a cycle that made sense and wasted nothing.
Composting isn’t complicated. You don’t need fancy equipment or a lot of space. A simple pile in the backyard or a small bin on the counter works fine.
What you can compost:
- Fruit and vegetable scraps. Peels, cores, stems, leaves, rinds—all of it.
- Coffee grounds and tea bags. Both add nitrogen to compost.
- Eggshells. Crushed eggshells add calcium.
- Bread, pasta, and grains. They break down quickly.
- Yard waste. Grass clippings, leaves, and small twigs.
What not to compost:
- Meat, bones, and dairy. They attract pests and smell bad as they rot.
- Oils and fats. They don’t break down well.
- Pet waste. It can contain harmful bacteria.
Composting reduces trash, enriches your garden, and completes the cycle of growing, cooking, and feeding the soil that feeds you.
Using Stale Bread
Stale bread isn’t trash. It’s an ingredient. Grandma turned it into croutons, breadcrumbs, stuffing, bread pudding, and French toast. She never threw out a loaf just because it wasn’t soft anymore.
How to use stale bread:
- Make croutons. Cube the bread, toss with olive oil, garlic, and salt, and bake until crispy.
- Make breadcrumbs. Toast the bread until dry, then pulse in a blender or food processor. Store in a jar and use in meatballs, casseroles, or as a topping.
- Make stuffing. Cube the bread, sauté with onions, celery, and herbs, moisten with broth, and bake.
- Make bread pudding. Soak stale bread in a mixture of eggs, milk, sugar, and spices. Bake until set. Serve warm with syrup or fruit.
- Make French toast. Stale bread soaks up the egg mixture better than fresh bread and makes fluffier French toast.
Stale bread is versatile and free if you were going to throw it out anyway. Learning to use it means one less thing in the trash and one more ingredient in your cooking.
Rotating Pantry Items
First in, first out. That’s the rule. Grandma kept older items in front and new purchases in back. This simple habit ensures you use things before they expire and prevents the problem of finding rock-hard flour or rancid oil shoved in the back of the cupboard.
How to rotate pantry items:
- When you buy new, put it behind what’s already there. Don’t just shove it wherever it fits.
- Check expiration dates when you organize. Move anything close to expiring to the front so you remember to use it.
- Do a pantry inventory every few months. See what you have too much of and plan meals around it.
- Use older items first. If you have two jars of peanut butter, open the older one first.
Rotation is a small habit that prevents waste and saves money. You’ll stop buying duplicates and throwing out expired food you didn’t know you had.
Keeping Kitchen Wisdom Alive
Keep a Kitchen Notebook
- Favorite family recipes. Write them down before they’re forgotten. Include the ones passed down and the ones you create yourself.
- Garden harvest notes. What did you plant? When did it come in? How much did you get? What grew well and what didn’t? This information helps you plan better next year.
- Canning records. What did you can? How many jars? What date? When you open the last jar of tomato sauce in February, you’ll know whether you need to make more next summer.
- Recipe modifications. If you changed a recipe and it turned out great, write it down. If it didn’t work, note that too. This prevents repeating mistakes and helps you remember what worked.
- Seasonal meal plans. What do you cook in summer when tomatoes are everywhere? What do you make in winter when you’re relying on pantry staples and root vegetables? Writing it down makes planning easier.
- Notes on what your family loves. Kids’ favorite meals, recipes that were a hit at holidays, dishes you want to make again. It’s easy to forget these things over time.
A kitchen notebook doesn’t have to be fancy. A simple spiral notebook works fine. The point is to write things down before you forget them. It becomes a record of your cooking life and a resource you’ll use for years.
Kitchen Skills Passed Down Through the Generations
These old-fashioned kitchen skills were once everyday knowledge passed naturally from one generation to the next. While modern conveniences have changed how we cook, the value of these skills remains the same.
Knowing how to measure ingredients accurately, cook from pantry staples, preserve food, reduce waste, and adapt to the seasons creates confidence that no shortcut can replace.
Every loaf of homemade bread, every jar of preserved tomatoes, and every handwritten recipe helps keep this practical wisdom alive.
By learning and sharing these skills, you’re doing more than feeding your family. You’re preserving a legacy of self-reliance, resourcefulness, and homemaking knowledge for future generations.