Last updated on July 11th, 2025 at 07:44 am
Knowing different fire starting methods can be essential in outdoor survival skills.
When you’re out in the great outdoors, being able to build a reliable fire isn’t just helpful, it can be lifesaving. Whether you’re prepping for emergency situations, heading on a camping trip, or diving into off-grid bushcraft trips, knowing how to start a small fire using different techniques gives you confidence and independence.
When I was just a young child, I learned how to start a fire using just some dry leaves and a magnifying glass. It’s good to have a few skills in your back pocket in case you ever need to rely on yourself.
In this guide, we’ll walk you through the top 10 fire starting methods that work in a variety of weather conditions, using both modern tools and traditional methods.
Why Fire Starting Skills Are So Important
The ability to start a fire supports warmth, cooking, water purification, and even protection in the wild. Understanding the fire triangle: heat, oxygen, and fuel, helps you build a fire that lasts.
Even if you have a fire starting kit, you need to know how to adapt when faced with wet conditions, dead wood, or no matches.
These skills are also essential for outdoor adventures, long hikes, and any situation where help might be far away.
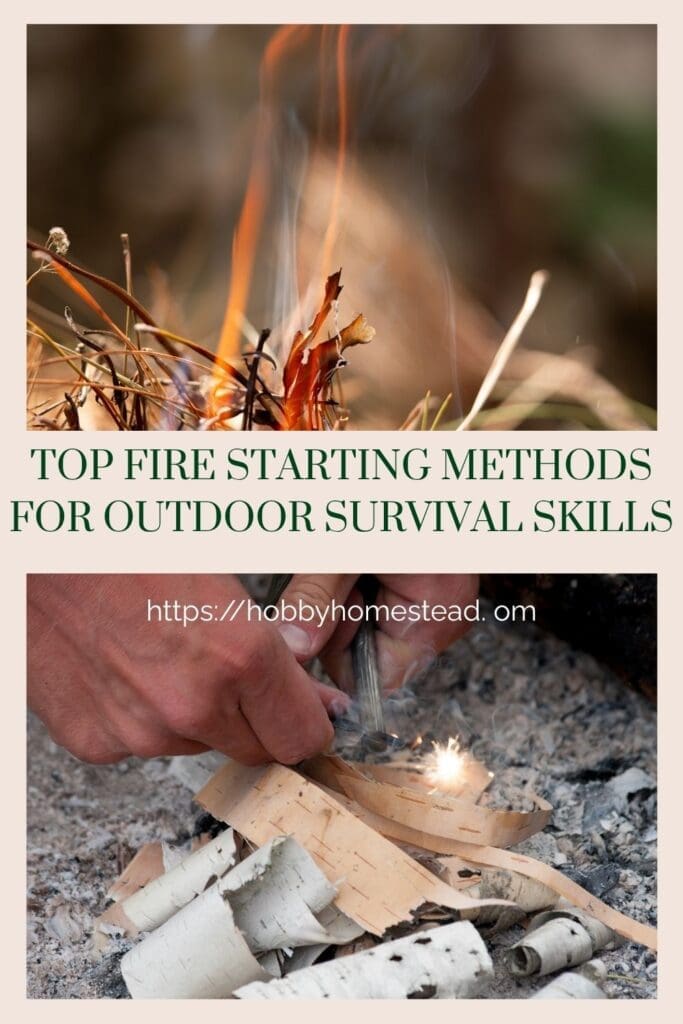
Table of contents
Fire Is a Tool: Start Small, Think Smart
Fire is one of the most basic tools of both comfort and survival. Yet many people struggle with it. Not because they lack the gear, but because they rush the process.
One of the biggest mistakes new campers or survivalists make is trying to start with wood that’s too large.
Just like most things in life, you have to start small and grow.
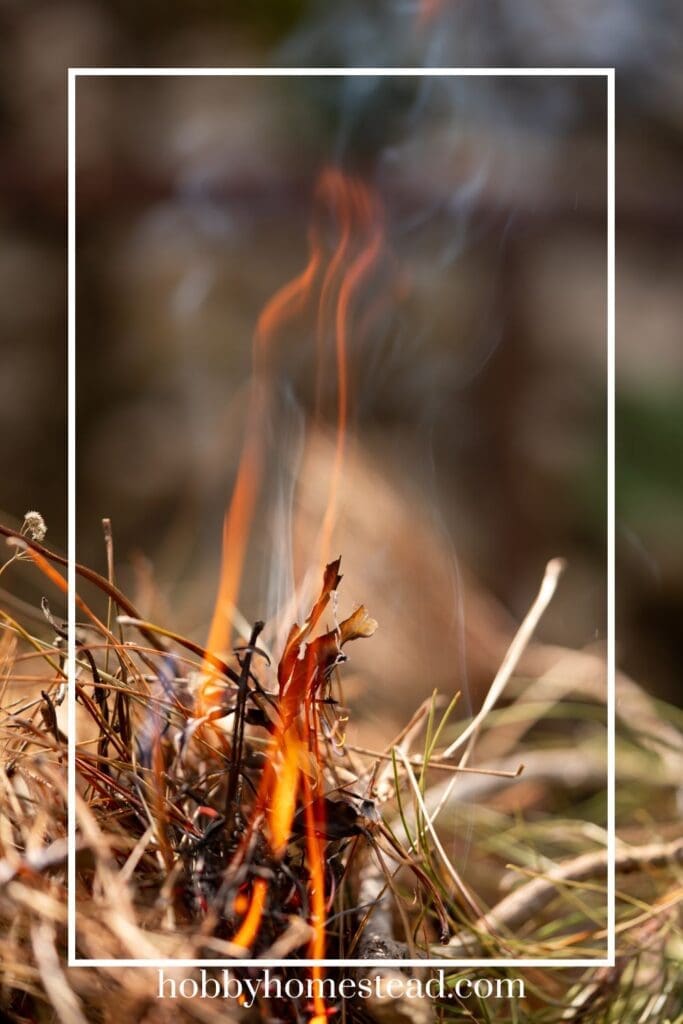
If you’re using a ferro rod, flint and steel, or magnifying glass, you’ll want a fine nest of tinder like dry grass, leaves, pine needles, or even a cotton ball.
If you’re lucky enough to have waterproof matches or a lighter, start with small twigs or birch bark. Things that catch easily.
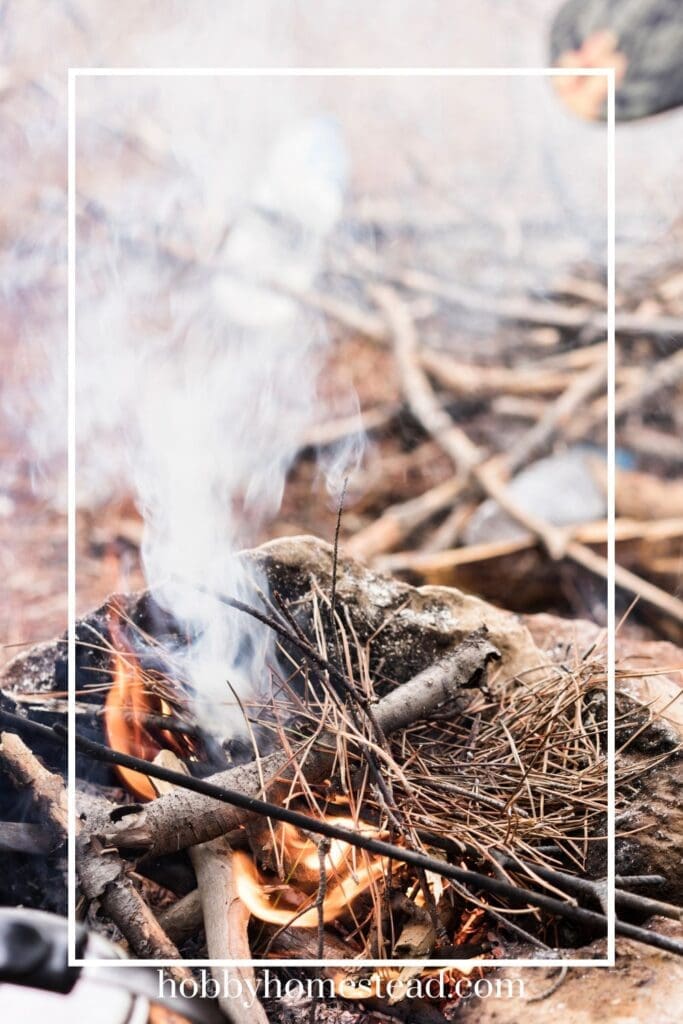
Then, increase the size of your fuel gradually. Add more small twigs, then finger-sized sticks, then larger dead wood.
Only build a large fire if you have enough firewood ready, because a big fire eats through fuel quickly.
It’s worth remembering that Native Americans and frontiersmen often favored small, efficient fires. They used just enough to cook or stay warm, conserving their wood and reducing the risk of wildfire.
And always clear the area before you build! Snow underneath can smother your flame, while dry leaves and pine needles can spark a disaster. Leaf litter can catch quickly and spread fire fast, putting your camp and your safety at risk.
Top 10 Fire Starting Methods for Outdoor Survival Skills
1. Waterproof Matches
An essential addition to any fire starting kit. These matches are treated to work even in wet conditions. Keep a few in a plastic bag or waterproof container inside your bug-out bag.
What You Need: Waterproof or stormproof matches, fire pit or safe fire area, tinder (like dry grass or cotton balls).
Steps:
- Gather your nest of tinder, such as dry grass or wood shavings.
- Create a small teepee of small twigs over the tinder.
- Strike a match against the matchbox or striker.
- Gently place the flame under the tinder until it catches.
- Slowly add dead wood or larger sticks as the fire builds.
✅ Best for: Camping trips and emergency situations.
🔥 Works even in: Wet conditions with proper tinder.
2. Lighters (Butane or Electric)
Great for beginners. Plasma arc lighters are windproof and rechargeable. Ideal for those looking for a sustainable option. Pack one along with a first aid kit for short or extended trips.
What You Need: Butane lighter or rechargeable plasma arc lighter, tinder, small sticks, fire pit.
Steps:
- Clear an area for your fire to prevent it from spreading.
- Make a base with dry material: leaves, bark, or cotton balls.
- Build a teepee structure over the tinder using small twigs.
- Use the lighter to ignite the tinder.
- As the fire grows, slowly add larger pieces of dead wood.
✅ Best for: Bug-out bags, everyday carry, or car camping.
⚠️ Tip: Keep your lighter dry or choose a windproof model.
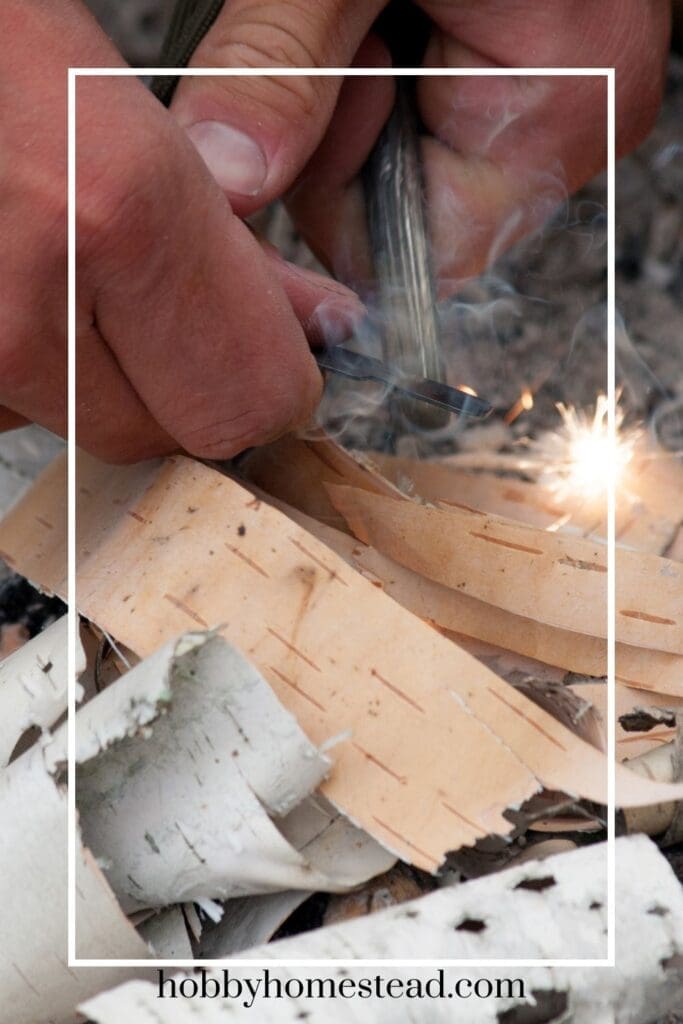
3. Ferrocerium Rod and Stainless Striking Blade
This is one of the most popular survival fire starters. A mini ferro rod paired with a stainless striking blade can produce sparks in nearly any weather. Works well with cotton balls, birch bark, and other dry material.
What You Need: Ferrocerium rod, stainless striking blade, fine tinder (cotton ball, birch bark, fire plug).
Steps:
- Prepare a small pile of very dry, fine tinder.
- Hold the ferro rod firmly near the base of the tinder.
- Scrape the blade quickly down the rod to create sparks.
- Aim the sparks toward the tinder until it begins to glow or ignite.
- Carefully blow on the ember to grow the flame, then add small twigs.
✅ Best for: Off-grid bushcraft trips, wet weather.
🧤 Pro Tip: Practice aiming sparks with a mini ferro rod at home.
4. Magnesium Block with Ferro Rod
Scrape off wood shavings of magnesium, then ignite them with sparks from the rod. The magnesium burns hot and fast, perfect for damp climates.
What You Need: Magnesium block with attached ferro rod, striker or knife, dry tinder.
Steps:
- Use the blade to shave a pile of magnesium about the size of a quarter.
- Place dry material next to the magnesium shavings.
- Strike the ferro rod to ignite the magnesium pile.
- Magnesium burns hot. Once it ignites, it should catch the tinder.
- Build your fire with small twigs, then add larger wood.
✅ Best for: Wet conditions and cold environments.
💥 Warning: Magnesium burns hot and fast. Be ready with fuel.
5. Steel Wool and Battery
Touch steel wool to both ends of a 9V battery, and sparks will fly. It’s a smart emergency option using items you may already have. This works best when you also have a nest of tinder like dry grass or small twigs ready.
What You Need: 9-volt battery, fine-grade steel wool, tinder.
Steps:
- Stretch out the steel wool to expose more surface area.
- Touch the battery terminals to the steel wool—it will spark instantly.
- Place the sparking steel wool into a nest of cotton balls or dry grass.
- Blow gently on the glowing wool until the tinder ignites.
- Build your fire as usual with wood shavings and twigs.
✅ Best for: Emergency situations, household item hack.
⚡ Safety Tip: Don’t store steel wool and batteries together in your bug-out bag.
6. Bow Drill or Hand Drill
These traditional methods take skill but are rewarding. Creating friction with dry wood produces hot coals that can ignite a piece of char cloth or dry grass. A bow drill fire is an excellent backup skill for wilderness survival.
What You Need: Bow, spindle, fireboard, socket (handhold), dry material, patience!
Steps:
- Carve a notch in the fireboard and place a piece of char cloth or leaf under it.
- Wrap the bowstring around the spindle and position it in the notch.
- Hold the socket on top of the spindle and saw the bow back and forth quickly.
- Friction will create hot coals in the notch.
- Transfer the ember to your tinder bundle and blow gently to ignite it.
✅ Best for: Practicing traditional methods.
🪵 Tip: Use very dry hardwood for the spindle and fireboard.
7. Fire Piston
A compressed air device that ignites char cloth from the heat of air compression. It’s an old-school method that’s making a comeback among serious outdoor enthusiasts.
What You Need: Fire piston, char cloth, tinder bundle.
Steps:
- Insert a small piece of char cloth into the piston head.
- Place the piston into the tube and strike it quickly and firmly.
- Remove the piston to reveal a glowing hot coal on the cloth.
- Transfer it to your tinder bundle and blow gently until it catches fire.
✅ Best for: Preppers and gear testers who love old-school tech.
🧯 Note: Always carry backup tinder like cotton balls.
8. Magnifying Glass (Lens-Based Method)
Harness the sun’s rays to focus heat on dry material like birch bark or cotton balls. This lens-based method is sustainable and quiet but only works in sunlight.
What You Need: Magnifying glass, sun, dry tinder (like birch bark or wood shavings).
Steps:
- On a sunny day, create a nest of tinder on flat ground.
- Hold the magnifying glass a few inches above the tinder.
- Focus the sunlight into the smallest, brightest point.
- Hold steady until the tinder starts to smoke and smolder.
- Gently blow on the ember and build up with small twigs.
✅ Best for: Sunny days, zero-fuel outdoor fire building.
🌞 Pro Tip: A lens-based method is great for kids (with supervision).
9. DIY Fire Starters
Homemade fire plugs made from cotton balls soaked in petroleum jelly or dryer lint dipped in wax are compact and burn long. They’re a best way to reuse household scraps and prepare for anything.
What You Need: Cotton balls, petroleum jelly, plastic bag.
Steps:
- Coat each cotton ball with petroleum jelly.
- Store them in a sealed bag in your survival kits or fire kit.
- When ready to use, fluff up a cotton ball for maximum surface area.
- Ignite it with a match, lighter, or ferro rod.
- One ball can burn for several minutes. Plenty of time to light wet wood or dry grass.
✅ Best for: Bug-out bags, budget-friendly preps.
🔥 Pro Tip: Make a bunch at once and store in your glovebox or emergency bin.
10. Commercial Fire Starters
Products like Black Beard Fire Starters or Insta-Fire Fire-Log are easy to store and use in any conditions—even with wet wood. These are especially useful for beginners or emergency situations. Look for discount codes and new product releases from survival gear suppliers.
What You Need: Brand-name fire starter (like Black Beard Fire Starters or Insta-Fire Fire-Log), ignition source
Steps:
- Open the package and pull off the recommended amount.
- Place it under your fire setup (teepee or log cabin style).
- Light it with a match, lighter, or spark.
- It will burn slowly and steadily, giving your kindling time to catch.
✅ Best for: Wet conditions, beginners, or backup fire starting.
🛒 Tip: Look for discount codes when stocking your emergency gear.
Bonus 🔦 Starting a Fire with a Flashlight Bulb (Emergency Method)
This method is an inventive survival hack that uses an old-school flashlight with an incandescent bulb. It’s a great trick to know if you’re caught in the wild without matches or lighters.
⚠️ Safety First:
Only use this method in true emergency situations. Glass shards can be dangerous, and mishandling batteries can cause injury. Never try this with LED flashlights—it only works with traditional filament bulbs.
🧰 What You Need:
- A flashlight with an incandescent bulb (not LED)
- Dry tinder (dry grass, cotton, or fine bark)
- Caution and steady hands
🔥 Steps:
- Remove the flashlight bulb from the unit.
- Gently break the glass bulb, being very careful not to damage the thin wire filament inside.
- Screw the broken bulb base back into the flashlight head as it was.
- Pack your dry tinder (such as dry grass, wood shavings, or char cloth) into the broken bulb area—right where the filament is visible.
- Turn on the flashlight. The power will heat the exposed filament red-hot.
- The tinder should catch fire immediately from the filament’s heat.
- Transfer the flame to your kindling and build your fire as normal.
✅ Best For:
- True emergency situations
- Improvised survival when no other ignition source is available
- Adding to your wilderness survival knowledge base
This method might not be part of your everyday fire starting kit, but it’s proof that knowing how things work—like a flashlight filament—can turn ordinary items into lifesaving tools in the great outdoors.
Tips for Building a Fire Outdoors
- Use small twigs, dry grass, and birch bark to create a nest of tinder.
- Add dead wood and dry material gradually to build up the fire.
- Be cautious with carbon monoxide—never build a fire in enclosed spaces.
- Always check fire safety rules, especially in the State of California, where outdoor fires may be restricted due to wildfire risk.
- Be aware that burning treated or synthetic materials can release chemicals linked to birth defects and reproductive harm.
Tinder vs. Kindling
What is Tinder?
Tinder is any dry, easily flammable material that catches a spark or small flame and helps you start a fire. It’s the very first layer in your fire-building process. Used before kindling (like twigs) and fuel wood (like logs).
What Makes Good Tinder?
- Dry: Moisture is the enemy of fire-starting.
- Light and airy: It needs good airflow to ignite.
- Small particles: The finer it is, the easier it catches a spark.
Examples of Natural Tinder in the Wild:
- Dry grass
- Pine needles
- Birch bark
- Dead leaves
- Wood shavings
- Cattail fluff
- Feather sticks (thin wood curls shaved from a stick)
Man-Made Tinder Options:
- Cotton balls (especially coated in petroleum jelly)
- Dryer lint
- Char cloth
- Fire plugs
- Commercial fire starters like Black Beard Fire Starters
- Steel wool
How to Use Tinder:
- Form a nest of tinder in your fire pit.
- Use a ferro rod, flint and steel, or waterproof matches to ignite the tinder.
- Once it catches, gradually add small twigs and build your fire from there.
✅ Tip: Always keep a stash of tinder in your bug-out bag, first aid kit, or fire starting kit. Especially for emergency situations or off-grid bushcraft trips.
What is Kindling?
Kindling is the next step up from tinder in the fire-building process. It consists of small sticks, twigs, or thin pieces of wood that catch fire easily from your burning tinder and help grow the flame strong enough to light larger logs or fuel wood.
What Makes Good Kindling?
- Dry: Just like tinder, moisture ruins kindling’s ability to catch fire.
- Small in diameter: Typically about the thickness of a pencil or your thumb.
- Lightweight and easy to break: It should snap, not bend.
Examples of Kindling Materials:
- Small twigs
- Thin, dead branches
- Wood splinters or shavings
- Feather sticks (shaved curls from a dry stick)
- Split pieces of larger dry logs
✅ Pro Tip: Collect kindling from standing deadwood, as it tends to stay dry even in wet conditions.
How to Use Kindling:
- Start your fire with a nest of tinder (like dry grass, cotton balls, or birch bark).
- Once the tinder is burning steadily, add a few pieces of kindling, arranging them in a teepee or crisscross pattern.
- As the kindling catches, gradually add larger sticks and then logs to build up to a sustained fire.
Tinder vs. Kindling
| Feature | Tinder | Kindling |
| Purpose | Catches the initial spark | Feeds the flame to grow larger |
| Size | Very small, fine material | Small sticks or wood pieces |
| Burns | Fast, short-lived flame | Longer burn, builds heat |
| Examples | Dryer lint, dry grass | Twigs, wood splinters |
Kindling is an essential addition to any fire, whether you’re starting one in a campfire, fire pit, or in the middle of the wilderness during a survival scenario.
Best Types of Wood to Build a Fire in the Wild
When building a fire in the wild, choosing the right wood is just as important as knowing how to light it. The best firewood burns hot, steady, and clean. Without too much smoke or sparking.
Here’s a quick guide to help you pick the best wood for your campfire or survival situation:
1. Dead and Dry Wood (Always First Choice)
Look for dead wood that’s off the ground and dry. It should snap cleanly and feel light. Avoid green, wet, or rotting wood—it smokes and doesn’t burn well.
✅ Best for: Any fire-building situation, especially when using survival fire starters
2. Softwoods (Great for Starting Fires)
Examples: Pine, cedar, fir, spruce
- Burns fast and hot
- Contains natural resins (great for catching a spark)
- Ideal for kindling and starting a fire in the rain with birch bark or a ferro rod
✅ Watch out: Can pop and spark more due to sap
3. Hardwoods (Great for Long-Lasting Fires)
Examples: Oak, maple, hickory, beech
- Burns slower and creates lasting hot coals
- Excellent for cooking and staying warm
- Ideal once the fire is already established
✅ Tip: Combine hardwoods with softwood kindling for the best fire setup in the wild
4. Birch Bark (Nature’s Fire Starter)
- Even when damp, birch bark lights easily
- Contains natural oils that catch sparks from a ferrocerium rod, flint and steel, or lens-based method
✅ Best use: Tear into strips and add to your nest of tinder
❌ Avoid These Woods
- Green wood (freshly cut) – too much moisture
- Rotting or moldy wood – smoky, smelly, poor heat
- Poisonous plants/woods (like poison ivy vines) – toxic smoke
- Treated wood – may release dangerous chemicals, including substances linked to reproductive harm and birth defects
Firewood in the Wild
The best way to get a fire going is to use small twigs and wood shavings from dry, resinous softwoods. Then feed the flame with heavier hardwoods for a lasting burn. If you’re in wet conditions, peel the bark or split sticks to find dry material inside.
Always leave no trace, extinguish fires completely, and respect local burn rules. Especially in areas like the State of California where fire bans are common due to high fire risk.
How to Start a Fire in the Rain
Wet weather makes fire building tricky, but not impossible.
Here’s how to do it:
- Look for dry material inside standing dead trees, under thick logs, or in the crooks of trees.
- Use a ferrocerium rod or Black Beard Fire Starter—they work even in damp conditions.
- Build a base with bark, small rocks, or a flat dry surface to keep tinder off the wet ground.
- Shield your flame from the wind with your body or a tarp.
- Blow gently once your hot coals catch and add dry twigs quickly.
✅ Pro Tip: Keep a stash of DIY fire starters (wax-coated cotton balls, fire plugs) in a waterproof bag inside your pack.
Finding Dry Wood in Wet Conditions
Even when it’s been raining for days, you can still find dry fuel. You just have to look harder.
- Under shelter: Search under rock ledges, inside hollow trees, or under thick evergreen branches.
- Standing dead wood: Break open sticks—if the inside is light and snaps cleanly, it’s dry.
- Peel the bark: Often the outer layer is soaked, but underneath is still dry.
- Feather sticks: Use your knife to shave curls from damp sticks to expose the dry core.
✅ Look for: Birch bark, dry pine needles, and wood shavings. They ignite even in damp conditions.
Bonus: Building a Fire with Minimal Resources
If you have nothing but your survival kit, here’s what to focus on:
- Use a mini ferro rod and steel wool or char cloth.
- Create a nest of tinder from your clothing lint, dry pocket contents, or leaves.
- Use the lens-based method with a magnifying glass if the sun is out.
- Be patient—fire building is as much about preparation as it is technique.
🔥 5 Fire Myths Busted
Even experienced campers and outdoor enthusiasts fall for fire-starting myths. Let’s clear the smoke and bust some of the most common ones that could leave you cold in the woods.
🔥 Myth 1: You Can Start a Fire With Just Big Logs
Busted: Fire needs to grow slowly. If you skip tinder and kindling and jump straight to logs, you’ll smother your flame.
✅ Truth: Always start small with dry grass, cotton balls, or birch bark. Then add small twigs and build from there.
🔥 Myth 2: Green Wood Burns Just Fine
Busted: Green wood is full of moisture and will create a smoky mess instead of hot coals. It’s hard to light and won’t keep a fire going.
✅ Truth: Look for dead wood, standing dry branches, or split damp wood to reach the dry core.
🔥 Myth 3: You Don’t Need to Clear the Ground
Busted: Starting a fire on wet soil or leaf litter is a recipe for disaster or no fire at all. Wet ground sucks away heat, and dry leaves can start dangerous ground fires.
✅ Truth: Clear the area down to bare earth or build a fire platform using rocks or bark.
🔥 Myth 4: A Lighter or Matches Are Enough
Busted: Fire tools help, but they’re useless without the right tinder, kindling, and technique. Especially in wet conditions.
✅ Truth: Always pack a fire starting kit with multiple ignition sources and backup tinder (like fire plugs or cotton balls coated in petroleum jelly).
🔥 Myth 5: Bigger Fires Are Better
Busted: Big fires burn through wood quickly and can get out of control. Especially in high-risk areas like the State of California.
✅ Truth: A small, well-managed fire provides plenty of warmth and heat. It’s safer, more efficient, and easier to maintain. Just ask any seasoned survivalist.
Fire Starting Methods Skills
Building a fire is one of the most empowering outdoor experiences you can have. Whether you’re relying on a ferrocerium rod, crafting a fire with austrian flints, or lighting up with a magnifying glass, these skills belong in every camper’s toolkit.
If you can practice these methods before your next camping trip or weekend off-grid. And don’t forget to add a fire starting kit to your survival kits. Right next to your first aid kit.