Making your own homemade cottage cheese is incredibly satisfying to create from scratch.
It’s a great way to enjoy fresh, creamy cheese. This recipe is perfect for anyone looking to use simple ingredients and avoid store-bought options. Or you are a dairy farmer on a small scale or even a larger scale.
When I was growing up, we went from milking 5 goats to milking over 75. By hand, I might add. We did ship our milk in milk cans to a dairy plant. But it was nice to use some for other recipes.
Simple and Wholesome Ingredients
With just a few ingredients like whole milk, lemon juice, and a little salt, you can turn your kitchen into a cozy test kitchen.
It’s a great alternative to ricotta or cream cheese and a versatile addition to your meals. This recipe adapts beautifully to different types of milk.

Types of Milk for Homemade Cottage Cheese
The type of milk you use can significantly affect the texture and flavor of your cottage cheese. Here’s a quick breakdown.
Whole Milk. This is the best choice for creamy, rich cottage cheese. The higher fat content results in a smoother, more luxurious texture. For the creamiest results, stick with milk, goat milk or cow milk. These produce the softest and most flavorful curds.
Raw Milk. If you’re lucky enough to have access to raw milk, this is a great option for making cottage cheese. It retains all of its natural enzymes and bacteria, which can result in a more flavorful curd and a softer texture.
Nonfat Milk. Using nonfat or skim milk will produce a leaner cottage cheese with a firmer texture. It’s a great option if you’re looking for a lighter version, but it won’t be as creamy.
Lactose-Free Milk. Lactose-free milk works just as well as regular milk for this recipe. It will produce slightly sweeter-tasting curds due to the absence of lactose but will otherwise have the same texture and consistency.
For the creamiest results, stick with whole or raw milk, as these produce the softest and most flavorful curds.
Giving you fresh cottage cheese that’s leagues ahead of anything you’ll find in the grocery store.
Note: This homemade cottage cheese recipe is designed for dairy milk, such as whole milk, 2% milk, and raw milk. Nut milks, like almond or cashew milk, don’t contain the proteins and fats needed to form curds and won’t produce the same result. If you’re interested in dairy-free options, you might explore other cheese alternatives that use nut or soy bases.
Homemade Cottage Cheese: Simple and Delicious DIY Recipe
As an Amazon Associate I earn from qualifying purchases.
Ingredients
- 1 Gallon Fresh Whole Milk or raw milk, if preferred
- 1/4 Cup Heavy Cream or sour cream, for added creaminess
- 1/4 Cup Lemon Juice or white vinegar, for curdling
- 1/2 Teaspoon Kosher Salt or to taste
Instructions
- Begin by pouring a gallon of milk and heavy cream into a large pot. If you’re using a thermometer, heat the milk on medium heat until it reaches around 190°F. If you don’t have a thermometer, heat the milk until it’s just about to simmer (small bubbles around the edges but not boiling).1 Gallon Fresh Whole Milk, 1/4 Cup Heavy Cream
- Slowly stir in the lemon juice or white vinegar with a wooden spoon. This will start to separate the milk proteins, creating soft curds. Give it a good stir and watch as the curds form.1/4 Cup Lemon Juice
- After stirring, remove the pot from heat and let it sit for about 10-15 minutes. This rest time allows the curds to fully develop, forming a solid curd and leaving the whey (liquid) behind.
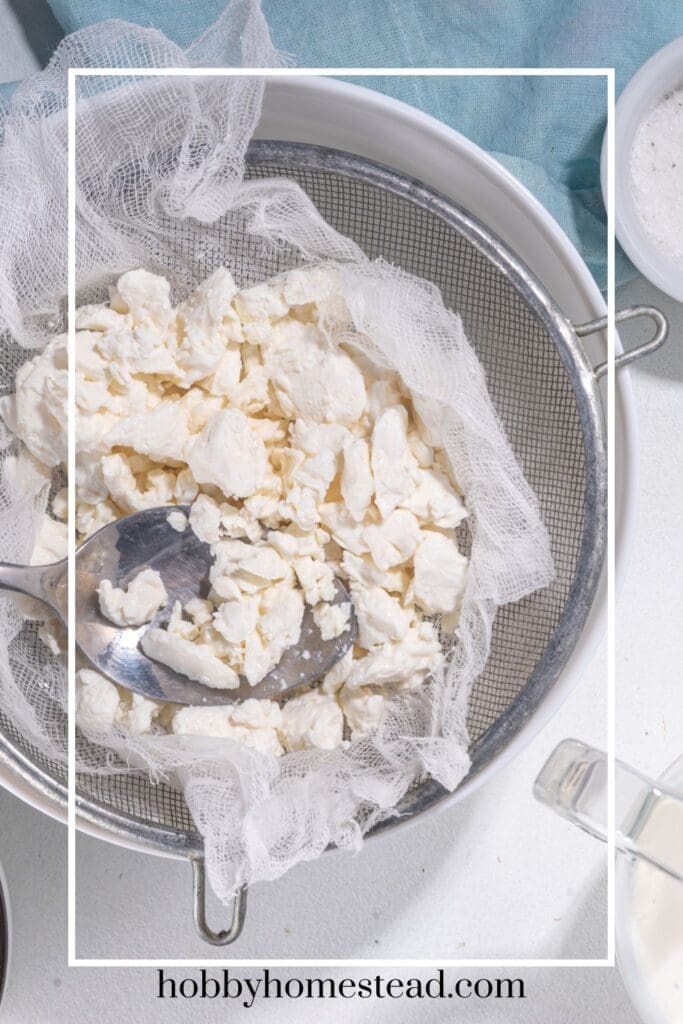
- Place a cheesecloth or tea towel over a large bowl and carefully pour the curds and whey into the cloth. Gather the edges of the cloth and gently press to remove excess whey. For a creamier texture, rinse the curds with cold water, which helps remove extra whey and creates a smaller curd size.
- Transfer the strained curds to a large bowl and add a little salt for flavor. For a creamy cottage cheese, stir in heavy cream or sour cream until you reach the desired texture.1/2 Teaspoon Kosher Salt
- Transfer your cottage cheese to an airtight container and refrigerate. Homemade cottage cheese has a shelf life of about 5-7 days in the fridge.
Nutrition
Recipe Tips
Choose Your Milk. This recipe works with various types of milk, including goat milk, nonfat milk, or lactose-free milk. Fresh milk yields the best results, so be sure to start with good-quality milk.
Curd Size. For smaller curds, rinse with cool water, and for a creamier cottage cheese, mix in a little extra cream or sour cream.
Experiment with Acids. While lemon juice and vinegar work well, you can try apple cider vinegar for a slightly different flavor.
Flavor Variations. For added depth, sprinkle in some black pepper, fresh garlic, or fresh herbs like chives or dill. You can also mix in a drizzle of honey for a touch of sweetness.
Heat Milk Slowly. Warming the milk gradually over medium or low heat helps prevent it from scalding at the bottom of the pan. This method also helps the milk proteins form soft, delicate curds, which result in a creamier cottage cheese.
Treat the Curds Gently. Once the curds have formed, handle them carefully. Rough stirring or squeezing can break the curds too much, leading to a grainy texture. By gently scooping or pressing the curds, you’ll achieve a more satisfying, creamy texture in your homemade cheese.
Variations
Tangy Cottage Cheese. Add a bit more lemon juice or try a splash of apple cider vinegar for a tangier flavor.
Savory Add-Ins. Fresh garlic, a dash of garlic powder, or even some olive oil stirred into the finished cheese can add richness and savory depth.
Sweetened Cottage Cheese. Cottage cheese pairs well with a drizzle of honey, fresh fruit like berries, or even lemon zest for a bright, sweet flavor.
Special Ingredients for Firmer Curds
If you’re aiming for firmer cottage cheese curds, there are a few special ingredients you can use:
Calcium Chloride. Cheese makers often add calcium chloride to help the milk proteins bond better, especially if you’re using store-bought milk that has been pasteurized. It helps the curds form more firmly and is particularly useful for achieving the perfect texture.
Tip. If you choose to use calcium chloride, follow the manufacturer’s instructions for how much to add, as using too much can make the curds too tough.
This ingredient isn’t required for homemade cottage cheese, but it can be a helpful tool if you’re seeking professional-level curds.
What to Do with Leftover Whey
Don’t throw away the leftover whey! This byproduct of making cottage cheese is full of nutrients and can be put to good use. Here are a few ideas:
Use in Baking. Replace some of the liquid in bread, pancake, or muffin recipes with whey for added flavor and nutrition.
Smoothies. Whey is packed with protein, so it makes a great addition to smoothies. Just blend it in with your favorite fruits and greens.
Soups and Stews. Use whey as a base for soups or as a liquid to cook grains or legumes.
Gardening. Whey is full of nutrients that plants love. Use it as a fertilizer for your garden or as a watering solution for your plants.
With a little creativity, you can find many ways to use whey, so don’t let it go to waste!
Adjusting Cottage Cheese Texture
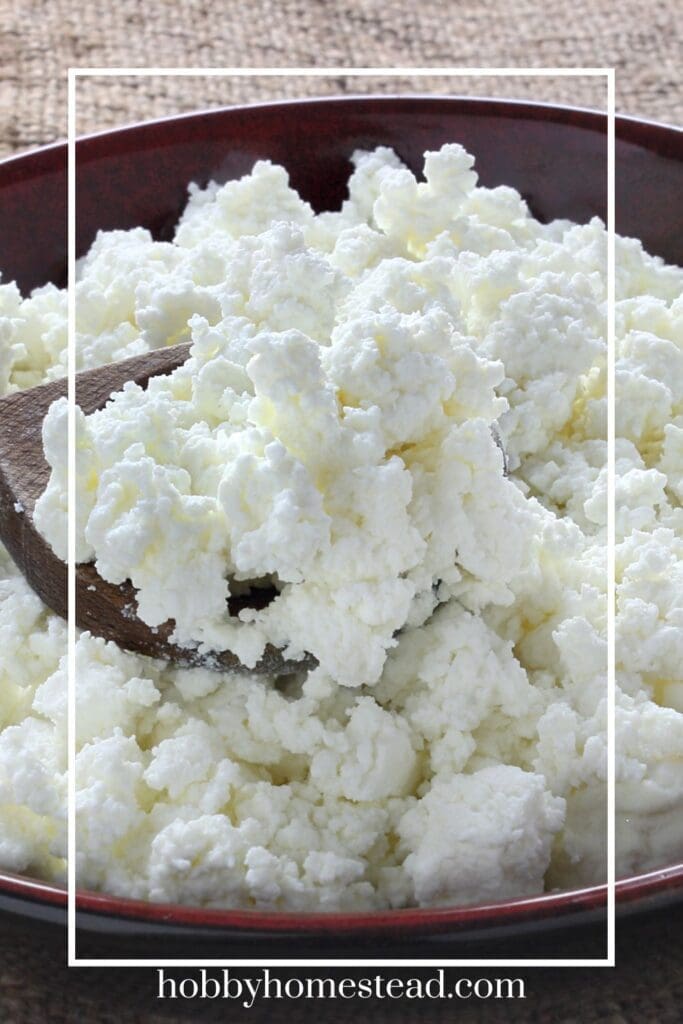
The texture of homemade cottage cheese is highly customizable.
For a Creamier Texture. If you prefer a creamier cottage cheese, stir in extra sour cream or heavy cream after straining the curds. This will result in a soft, rich, and smooth cheese.
For a Firmer Texture. If you like drier cottage cheese with a firmer curd, press the curds more firmly to remove excess whey, or allow them to drain for a little longer. This will give you a crumblier texture.
Experimenting with these adjustments can help you get the perfect texture to suit your preferences.
Serving Ideas for Homemade Cottage Cheese
Homemade cottage cheese is incredibly versatile and can be used in a variety of dishes. Here are a few ideas to inspire you:
Sweet and Savory. Top your cottage cheese with fresh fruit like berries, sliced peaches, or a drizzle of honey for a light, sweet treat. Or, for a savory twist, top it with chopped fresh herbs, a sprinkle of black pepper, or a drizzle of olive oil.
In Salads. Cottage cheese pairs beautifully with fresh greens, cherry tomatoes, cucumbers, and a light vinaigrette. It adds a creamy, satisfying element to any salad.
As a Filling. Cottage cheese is great in stuffed peppers, lasagna, or as a filling for pastries. It’s also fantastic mixed with cooked spinach or sautéed garlic for a savory spread.
The possibilities are endless, and once you make your own, you’ll be inspired to try it in countless dishes.
Storing and Freezing Cottage Cheese
Homemade cottage cheese doesn’t have the long shelf life of store-bought versions, so it’s best to use it within 5-7 days when stored in an airtight container in the refrigerator.
Freezing. While it’s tempting to freeze homemade cottage cheese to extend its life, it’s not the best option. Freezing can change the texture, making it watery and grainy when thawed.
If you do decide to freeze it, you can still use it in cooked dishes, but it won’t have the same fresh texture as when it’s stored in the fridge.
Troubleshooting Tips
Even experienced cheese makers run into the occasional issue. Here are a few common problems and how to solve them:
Curds Not Forming. If the curds aren’t separating from the whey, try adding a bit more lemon juice or vinegar. Ensure the milk is at the right temperature (190°F) before adding the acid. If the milk is too cool, it won’t curdle properly.
Curds Too Soft. If your curds are too soft, you can let them sit a little longer to firm up. Pressing them gently after straining will also help achieve a firmer texture.
Too Much Whey. If you end up with more whey than you want, simply let the curds drain for longer. You can also use the extra whey for other recipes, as mentioned earlier.
Conclusion
Making cottage cheese at home is not only a wonderful way to enjoy fresh, tangy cheese but also a skill that connects you with traditional homesteading practices. From using surplus milk on the farm to experimenting with different ways to curdle, the process of making your own cheese goes a long way in adding more self-sufficiency to your kitchen. So next time you’re at the grocery store, skip the pre-packaged options, and try this easy recipe for delicious homemade cottage cheese. It’s truly a great way to explore the art of cheese-making, right in your own kitchen!
With these additions, your readers will have a well-rounded guide to making, storing, and enjoying homemade cottage cheese.






Thanks for this information.