Fortunately, with a few basic materials and a little resourcefulness, you can make your own candles in the wilderness. No fancy molds or supplies needed, just what you can forage or pack.
We have 7 different ways to make a rustic candle. Simple Survival Light Using Fat, Oil, and Foraged Materials
When you’re without power and deep in the woods or even facing an extended blackout at home, having light is more than a convenience. It’s comfort, warmth, safety, and sometimes even a signal.
Why Make Candles in the Wild?
Candles can:
- Light your shelter or cooking area
- Help dry damp gear or warm a small space
- Boost morale and ease anxiety in emergencies
- Provide silent light without draining batteries
What You Need to Make a Wilderness Candle
At its core, a candle needs only two things.
- Fuel (wax, oil, or fat)
- A wick (something that will hold a slow-burning flame)
Wilderness Candle Container Ideas
Almost anything nonflammable and heatproof can work as a candle mold. Here are great options. Some you might pack, others you can forage.
Found or Packed Containers:
- Metal bottle caps
- Empty tuna cans or Altoid tins
- Small glass jars
- Eggshells (fill half with wax)
- Seashells
🌿 Foraged or Natural Containers:
- Hollowed-out tree branch (choose dry, non-resinous wood like aspen or oak; scoop out the center to create a wax well)
- Large nut shells (walnut halves work well)
- Thick bark bowls
- Dried gourds or mini pumpkins
- Orange or lemon peel cups
Wick Ideas
You don’t need store-bought wicks. Try:
- Cotton string, twine, or shoelaces (remove plastic ends)
- Strips of cotton cloth (t-shirt, sock, bandana)
- Plant fibers twisted together
- Paper towel strips, tightly rolled
Soak or dip the wick in your melted wax/fat to prime it before use. This helps it light easier.
Candle Type #1: Tallow (Animal Fat) Candle
What You’ll Need:
- Rendered animal fat (beef or pork tallow works best)
- Wick material
- A nonflammable container
Step-by-Step:
- Render the fat. Cut into chunks, place in a pot, and heat gently over a fire. Stir occasionally. Strain out solids once melted.
- Secure your wick. Wrap wick around a small stick or lay it in the center of your container.
- Pour the tallow. Carefully pour into your container while hot.
- Let cool completely. This usually takes 30–60 minutes.
- Trim the wick to about 1/4 inch.
- Light and enjoy. Tallow burns slowly and has a soft, warm light.
Tip. These candles may have a slight scent. Store away from heat when not in use.
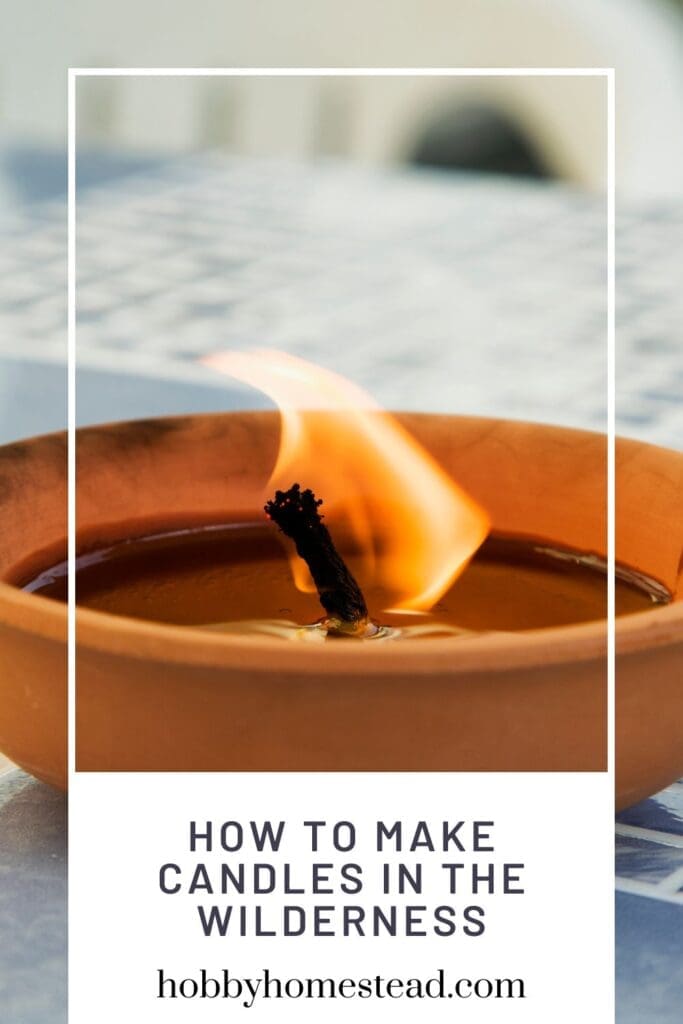
Candle Type #2: Olive Oil or Cooking Oil Lamp
What You’ll Need:
- A shallow container (jar, seashell, or orange peel)
- Cooking oil (olive, canola, or even bacon grease)
- Wick material
- A piece of foil or cork (optional wick holder)
Step-by-Step:
- Fill your container with about 1/2 inch of oil.
- Insert the wick into the oil.
- If using foil, poke a hole and thread the wick through to help it stand upright.
- Let the wick soak for a few minutes before lighting.
- Light the wick and monitor it. Adjust oil level as needed.
Note. These work great for indoor use and give steady light.
Candle Type #3: Butter Candle
What You’ll Need:
- A stick of butter
- Toothpick or small twig
- Wick material
Step-by-Step:
- Cut the butter in half to expose a flat surface.
- Poke a hole in the center using a toothpick or stick.
- Insert a primed wick (dip it in butter if possible).
- Let wick absorb for a minute, then light.
One stick can burn for up to 4 hours.
Candle Type #4: Orange Peel Candle
Perfect when you’re foraging or cooking in camp.
What You’ll Need:
- A halved orange, with peel intact
- Olive oil or other fat
- The pithy “stem” inside the peel (acts as wick)
Step-by-Step:
- Cut the orange in half and gently scoop out the fruit, leaving the white pith “stem” attached in the center.
- Fill the peel with oil until it nearly reaches the pith.
- Let soak for 5–10 minutes.
- Light the pith wick. It might take a few tries, but it will catch.
Smells great and gives soft ambient light.
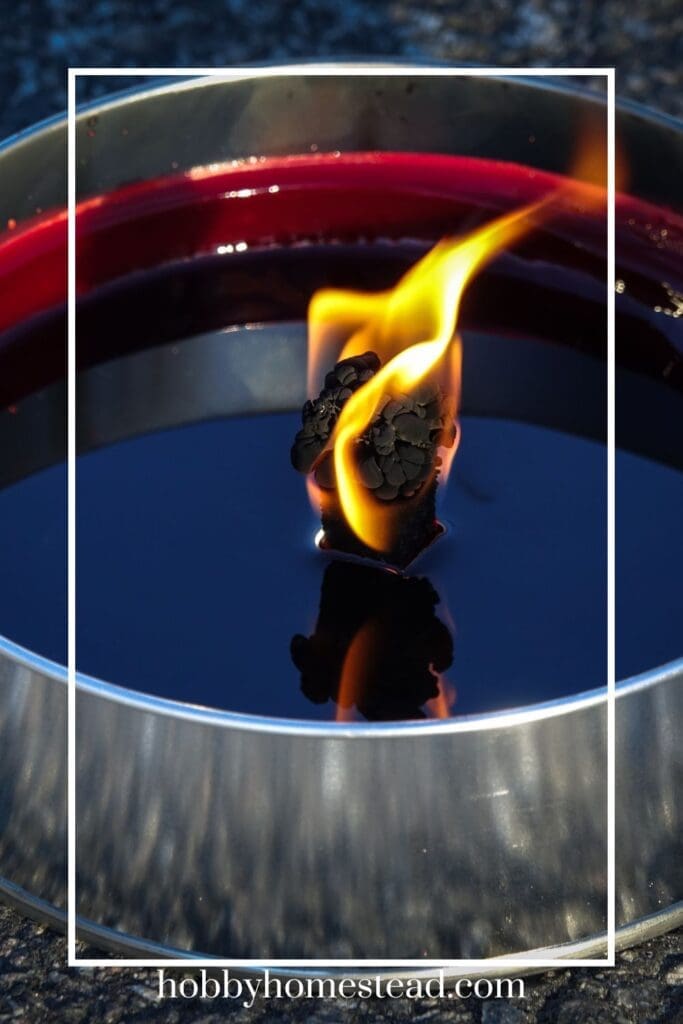
Candle Type #5: Improvised Wax Candle
If you have access to leftover wax (from old candles, crayons, or beeswax):
- Melt the wax in a tin or over a fire.
- Pour it carefully into a container with a wick.
- Hold the wick upright as it sets (use a stick or skewer).
- Trim the wick once hardened.
These candles can last for hours and are reusable.
Candle Type #6: Pine Resin or Tree Sap Candle
A sticky, flammable option when fat or oil isn’t available
If you’re in a forested area and come across pine trees or other conifers, you may notice sticky, amber-colored resin (also called sap or pitch) seeping from the bark. This substance is highly flammable — perfect for emergency candles and fire starters.
What You’ll Need:
- Pine resin, pitch, or tree sap (look for hardened or semi-hard clumps)
- A small metal or bark container (seashell, half walnut shell, or carved-out branch)
- Wick material (cotton string, bark fiber, etc.)
Step-by-Step:
- Collect resin. Look for pine, spruce, or fir trees. Harvest dried or semi-dried globs from bark wounds. (Don’t damage healthy trees.)
- Melt the resin. Place it in a tin can or metal cup and heat gently over a fire. Be cautious — it’s sticky and flammable.
- Prepare your container and wick. Set the wick in the center of your container. Use a small stick to keep it upright.
- Pour in melted resin. Fill the container carefully, coating the wick if possible.
- Let cool and harden. The resin will solidify into a candle block. Trim wick if needed.
- Light. Resin candles burn with a bright, crackling flame. They smell piney and are quite smoky.
⚠️ Caution:
- Use outdoors or in well-ventilated shelters — resin can smoke heavily.
- Don’t overheat or expose to open flames while melting — it can flash ignite.
- Resin can be combined with tallow or wax for a more stable candle.
Candle Type #7: Rice, Water, and Oil Emergency Candle
This method works great when you don’t have wax or solid fat. The rice and water act as a stable base, and the oil fuels the flame through a wick.
🧂 What You’ll Need:
- A small glass jar, tin, or sturdy cup
- A few tablespoons of uncooked rice
- A small amount of water (just to moisten the rice)
- Vegetable oil (olive, canola, sunflower, etc.)
- A wick (cotton string, twisted paper towel, or cloth strip)
- A toothpick or stick to hold the wick upright
🔥 Step-by-Step Instructions:
- Add rice to your container
Pour in enough uncooked rice to cover the bottom. About 1–2 inches deep. - Add just a splash of water
This keeps the rice from burning and helps weigh it down. You’re not trying to soak it. Just moisten. - Pour in the oil
Slowly add vegetable oil until it covers the top of the rice. The oil will float above the water and rice. - Insert the wick
- Use a toothpick or small stick to anchor the wick and keep it upright.
- Let the wick soak up oil for at least a minute before lighting.
- Light the wick
- Use a lighter or match to ignite the top.
- It will draw oil upward and burn like a mini lamp.
💡 Notes:
- These can burn for several hours, depending on the wick size and amount of oil.
- Keep the flame low and contained. This is best as a stationary light source.
- Ideal for power outages, off-grid shelters, or emergency situations.
🔒 Safety First:
- Place the lamp on a non-flammable, stable surface.
- Don’t move it while lit.
- Keep it away from pets, curtains, or flammable materials.
Natural Tree Sources for Resin Candles:
- Pine
- Spruce
- Fir
- Cedar
- Juniper (less common, but usable)
Bonus Tip. If you scrape bark or find damaged branches, check for crystallized sap — this version is easiest to melt and mix.
Candle Safety Reminders
Even in the wild, safety matters:
- Always place candles on nonflammable, stable surfaces.
- Keep away from bedding, tents, or dry brush.
- Never leave unattended, especially around children or pets.
- Snuff out flames completely when done.
Get Creative and Build Your Own Candle
Candles may be simple, but they offer powerful reassurance when you’re off-grid or in survival mode. With just a little fat, fire, and foraged material, you can build the light you need. No store run required.
Whether you’re a prepper, homesteader, or weekend camper, this is a skill worth learning. It’s one more way to say: we’ve got this.