
Last updated on September 22nd, 2026 at 10:40 am
A simple fermented homemade sauerkraut made with just 2 ingredients; fresh cabbage and salt.
If you have ever grown more cabbage than your family can eat fresh, homemade sauerkraut is a wonderful way to preserve it. With just cabbage and salt, you can turn a fresh garden harvest into a tangy fermented food that keeps for months in the refrigerator.
Small Batch Sauerkraut. No need for a fermentation crock or a complicated setup. Today I’m showing you how to make a small batch of sauerkraut in a mason jar. It’s just enough kraut to get you hooked.
Once the cabbage is prepared and packed into the jars, time takes over.
This is also one of those homesteading projects where a kitchen scale is especially useful. Rather than guessing how much salt to add, we weigh the prepared cabbage and calculate the salt from its weight.
Why Ferment Sauerkraut?
Lacto-fermentation is an old-fashioned way of preserving vegetables, and sauerkraut is one of the simplest places to start. Instead of relying on a freezer, refrigerator, or canner, fermentation uses salt and naturally occurring bacteria to transform fresh cabbage into something that can be enjoyed long after cabbage season.
Here are a few reasons we like making sauerkraut this way:
- It extends the life of fresh cabbage. Fermentation turns a seasonal vegetable into something we can enjoy for months when properly stored.
- The process requires very little equipment. A few basic supplies, fresh cabbage, salt, and some patience are enough to get started.
- It develops wonderful flavor. The cabbage becomes pleasantly tangy and sour as it ferments, giving it a completely different character from fresh cabbage.
- It’s an old-fashioned skill worth keeping. Fermenting vegetables is a practical preservation method that has been passed down through generations.
- It gives us another way to enjoy cabbage. Once fermented, sauerkraut is delicious served alongside meats, added to sandwiches, or enjoyed as a simple side dish.
Fermentation also produces lactic acid and beneficial fermentation bacteria. If you want to enjoy the live cultures, keep the finished sauerkraut refrigerated or frozen rather than heating it through a canning process. Freezing stops fermentation while preserving fermentation bacteria, although the texture may change somewhat after thawing.
For us, one of the best things about fermenting sauerkraut is that it combines simple ingredients, an old-fashioned preservation method, and a food we genuinely enjoy eating.

What You Need to Get Started
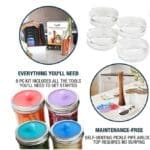
The equipment for a small batch is fairly simple. You don’t need a large fermentation crock to make sauerkraut. Two quart jars are enough for this recipe, making it a manageable project even if you’re new to fermentation. You also need a kitchen scale, weights, some kind of wooden spoon or sauerkraut tamper, and breather lids.
Quick Recipe Overview
Making sauerkraut is a simple process, but it does take some patience. Here’s what you’ll do:
- Shred and salt the cabbage. Shred the cabbage, weigh it, and add salt equal to 2% of the cabbage’s weight. Let it rest briefly, then massage it until the cabbage becomes soft and releases plenty of liquid.
- Pack it into jars. Firmly pack the cabbage into clean jars, pressing it down to remove air pockets. The cabbage will release its natural juices, creating the salty brine needed for fermentation. Add a cabbage leaf and fermentation weight to keep everything submerged.
- Let it ferment. Place the jars in a cool location and let the natural fermentation process take place. Around 70–75°F, sauerkraut commonly takes about 3–4 weeks, although cooler temperatures can make it take longer. Start tasting around three weeks and let it ferment longer if you’d like a stronger, more sour flavor.
- Refrigerate and enjoy. Once the sauerkraut has reached the flavor you like, move it to the refrigerator to slow the fermentation and enjoy it with your favorite meals.
Watch our video on How to Make Sauerkraut with our Simple Method.

Homemade Sauerkraut: A Simple Way to Preserve Cabbage
As an Amazon Associate I earn from qualifying purchases.
Equipment

Ingredients
- 1 Large Head Cabbage about 5 pounds
- 3 Tablespoons Canning Salt weigh your prepared cabbage and calculate the salt — 2% of the weight of the prepared cabbage
Instructions
- Prepare the cabbage. Remove any damaged outer leaves. Save two large, clean outer leaves for later. Cut the remaining cabbage into quarters and remove the core.1 Large Head Cabbage
- Slice the cabbage. Slice each quarter into strips approximately 1/8 inch thick and no longer than 3 inches. Place the shredded cabbage in a large bowl.
- Weigh the cabbage. Weigh the prepared cabbage and calculate 2% of its weight. Use that amount of canning salt. For example, 5 lb cabbage = 2,268 g of cabbage requires 45 grams of salt (3 Tablespoons).
- Add the salt. Sprinkle the calculated amount of salt over the cabbage. Let it rest for at least 10 minutes.3 Tablespoons Canning Salt
- Massage the cabbage. Using clean hands, massage and squeeze the cabbage until it becomes soft and translucent and releases plenty of liquid. The liquid will become the natural brine.
- Pack the jars. Using clean tongs, add a few inches of cabbage to a wide-mouth quart jar. Firmly tamp it down with a wooden spoon or tamper to remove air pockets and bring the brine up around the cabbage. Continue adding and tamping the cabbage until the jar is nearly full, leaving room for the cabbage leaf and fermentation weight. Repeat with the second jar.
- Add the cabbage leaf. Place one of the saved cabbage leaves over the shredded cabbage. Trim it to fit the jar with a slight overhang. Gently press the leaf down so it is beneath the brine. Repeat for the second jar.
- Add the fermentation weight. Place a fermentation weight on top of the cabbage leaf, making sure the cabbage remains submerged beneath the brine.
- Cover the jars. Place a fermentation breather lid on each jar and secure with a jar ring.
- Ferment. Place the jars in a clean location away from direct sunlight. A temperature around 70–75°F is generally suitable for fermentation. Allow approximately 3–4 weeks, depending on temperature and your desired flavor.
- Check the sauerkraut. Begin tasting around three weeks. Use a clean fork to reach beneath the cabbage leaf and take a small amount. If you like the flavor, fermentation is complete. For a stronger sour flavor, allow it to ferment another week or two.
- Refrigerate. Once the sauerkraut has reached the flavor you like, transfer it to the refrigerator. Keep the cabbage covered with brine and use a clean utensil when serving.
Notes
Important Fermentation Notes
Fermentation Time
Approximately: 3–4 weeks at 70–75°F Fermentation time can vary depending on temperature and personal preference.- A cloudy brine can occur during fermentation and does not necessarily indicate spoilage.
- A sour, fermented aroma is expected.
- If the sauerkraut develops a rotten, rancid, or distinctly unpleasant odor, significant mold, or unusual discoloration, discard it without tasting.
- Do not reduce the salt simply to make the finished sauerkraut less salty. Salt is an important part of the fermentation process.
- 5 lb cabbage = 2,268 g
- 2% of 2,268 g = 45.36 g salt
- Fine canning/pickling salt ≈ 15 g per tablespoon, so 45 g ≈ 3 tbsp
Equipment
For this recipe, use:- Wide-mouth quart jars
- Glass fermentation weights or alternative food-safe weight source
- Fermentation breather lids or alternative food-safe method
- Jar rings
Nutrition
Why Use Fermentation Weights?
The cabbage needs to stay underneath the brine while it ferments. Small pieces of shredded cabbage have a tendency to float, which is why fermentation weights are so helpful.
The cabbage leaf placed underneath the weight provides another layer that helps hold the shredded cabbage down.
A Little Patience Goes a Long Way
Fermentation isn’t something you can rush.
At around 70–75°F, sauerkraut commonly takes about three to four weeks to ferment. Cooler temperatures can slow the process, while warmer conditions can speed it up.
We usually start checking ours around the three-week mark. At that point, you can taste a small amount from beneath the cabbage leaf and decide whether you like the flavor.
If you want a stronger, more developed sour flavor, simply allow it to continue fermenting a little longer.
The nice thing about making your own is that you get to decide when the flavor is right for you.
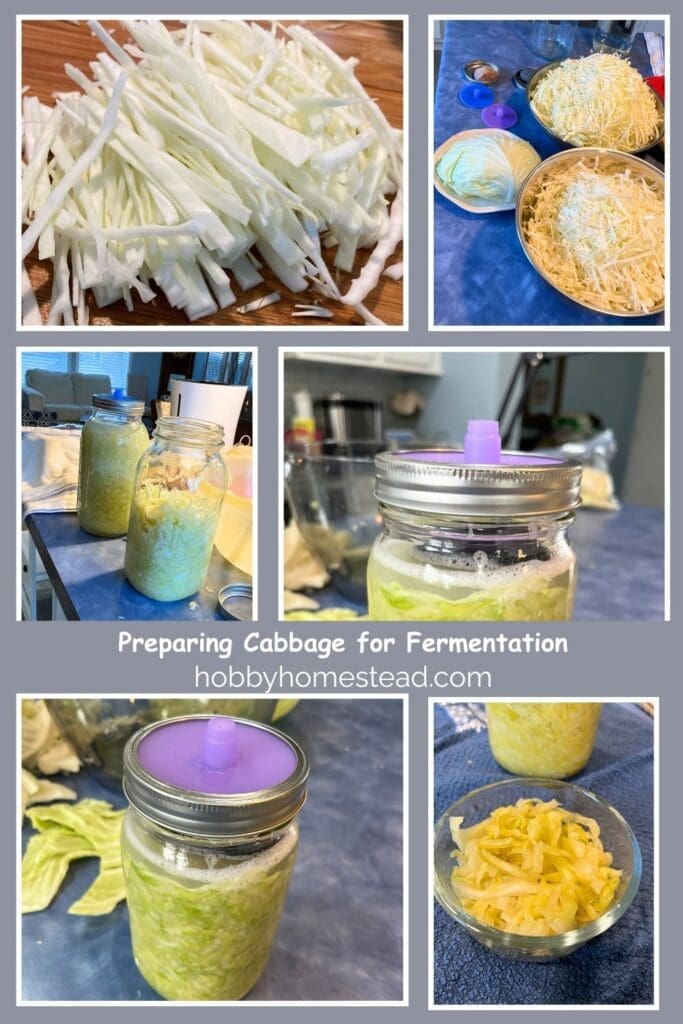
What Should Sauerkraut Look and Smell Like?
Fermenting cabbage changes as it progresses, so don’t expect it to look exactly like fresh shredded cabbage.
The brine may become somewhat cloudy, and you may notice bubbles during active fermentation. These changes can be normal.
The aroma should become distinctly sour and fermented rather than smelling fresh like raw cabbage. However, if the sauerkraut develops a rotten, rancid, or otherwise distinctly unpleasant odor, or if you see significant mold or unusual discoloration, discard it rather than tasting it.
Keeping the cabbage submerged beneath the brine throughout fermentation is one of the most important things you can do.
Don’t Be Afraid of the Sour Flavor
Freshly fermented sauerkraut can have quite a bit of tang. That’s part of what makes it so good alongside rich foods such as pork and sausage.
If you prefer a milder sauerkraut, you can begin tasting it once it has fermented sufficiently and move it to the refrigerator when you like the flavor.
If you prefer it more sour, give it additional time.
Once refrigerated, the cooler temperature slows the fermentation process considerably.
How to Store Homemade Sauerkraut
When your sauerkraut tastes the way you want it to, transfer the jars to the refrigerator.
Keep the sauerkraut covered with its brine as much as possible, and always use a clean fork or utensil when removing some from the jar.
Properly fermented vegetables can be refrigerated for an extended period; University of Minnesota Extension notes that fermented produce can be refrigerated for up to nine months.
Ways to Enjoy Sauerkraut
Homemade sauerkraut is especially good with foods that benefit from a little acidity.
Try serving it with:
- Bratwurst or other sausages
- Pork chops
- Roast pork
- Corned beef
- Reuben sandwiches
- Roasted potatoes
- Eggs
- Beans and other hearty meals
You can also simply serve a small spoonful alongside dinner. Sometimes the simplest way is the best.
Can You Freeze Homemade Sauerkraut?
Yes, homemade sauerkraut can be frozen, and freezing is a good option if you have made more than you can use within a reasonable amount of time.
One question that often comes up is whether freezing destroys the beneficial bacteria created during fermentation.
Freezing stops the fermentation process, but it does not destroy all of the beneficial fermentation bacteria. Penn State Extension specifically notes that freezing sauerkraut preserves the fermentation bacteria, which is one reason some people choose this method for storing homemade sauerkraut.
This makes freezing different from canning. Canning requires heating the sauerkraut to high temperatures, which destroys the beneficial Lactobacillus bacteria.
Freezing can, however, change the texture. The cabbage may be somewhat softer after it thaws, so frozen sauerkraut is especially good for cooked dishes where a little loss of crispness isn’t a concern.
How to Freeze Sauerkraut
Once your sauerkraut has finished fermenting, pack it into freezer-safe containers, leaving room for expansion.
Penn State Extension recommends allowing about ½ inch of headspace when freezing sauerkraut in pint or quart freezer containers.
Label the containers with the date and place them in the freezer.
When you’re ready to use it, thaw the sauerkraut in the refrigerator rather than leaving it at room temperature. Freezing stops microbial growth, but it does not kill microorganisms that may be present, so proper thawing and handling are still important.

Freezing vs. Refrigerating
If you have room in the refrigerator, refrigeration is an excellent choice for fermented sauerkraut and preserves its fresh fermented texture better.
If you’ve made a large batch, however, freezing gives you another way to store it for later. Minnesota Extension notes that fermented produce can be stored in the freezer indefinitely, although quality and texture can change over time.
For the best texture, we would use refrigerated sauerkraut first and freeze the extra.
| Storage method | Fermentation bacteria | Texture |
| Refrigerator | Preserved | Best texture |
| Freezer | Many beneficial bacteria preserved | May become softer |
| Canning | Beneficial bacteria destroyed by heat | Can become softer |
Sauerkraut Equipment: What You Need and Homemade Alternatives
One of the nice things about making sauerkraut is that you don’t need a collection of specialized fermentation equipment to get started.
We use wide-mouth quart jars, fermentation weights, and breather lids because they make the process easy and convenient. However, there are other ways to accomplish the same basic tasks.
The two most important things to remember are keeping the cabbage beneath the brine and allowing the gases produced during fermentation to escape.
Here are some of the options you may come across.
Wide-Mouth Jars
For this small batch, we use two wide-mouth quart jars. Wide-mouth jars make it easier to pack the shredded cabbage into the jar and to add a fermentation weight.
Small-batch sauerkraut can be made in quart or half-gallon jars. Penn State Extension specifically provides directions for making sauerkraut in quart jars, while noting that small jars require extra attention to keeping the cabbage submerged.
Larger batches can also be made in food-grade glass or plastic containers or traditional fermentation crocks. The National Center for Home Food Preservation recommends food-grade containers and notes that glass and food-grade plastic can be used instead of traditional stone crocks.
Fermentation Weights
A fermentation weight sits on top of the cabbage and keeps it underneath the brine.
The cabbage near the surface tends to float, so when fermenting in a mason jar, you need to either tamp down the cabbage a few times a day or place a large outer leaf of cabbage over the surface of the shredded cabbage to hold it down.
Purchased glass or ceramic fermentation weights are the easiest option. They are made specifically for fermentation, are food-grade, easy to clean, and fit inside the jar opening.
If you ferment vegetables regularly, they are a handy piece of equipment to have.
However, you don’t necessarily have to purchase special weights.
Homemade Weight Options
The basic purpose of a weight is simply to keep the cabbage submerged. Research-based home-fermentation instructions describe several alternatives.
One option is a food-grade plastic bag filled with brine. The bag is sealed and placed over the cabbage. Using brine rather than plain water is important because if the bag leaks, it won’t dilute the salt concentration of the ferment. Both the National Center for Home Food Preservation and Penn State Extension describe this method.
For larger fermentation containers, another traditional method is to place a food-safe plate over the vegetables and use sealed jars filled with water as the weight.
For a small Mason jar, however, a purpose-made fermentation weight or another compact food-safe weight is generally much easier.
What About Glass Marbles?
You may also hear about using plain glass marbles inside cheesecloth as a homemade fermentation weight.
If you choose this method, the marbles should be clean, plain glass intended for a food-safe purpose, without paint, decorative coatings, or other finishes. Place them inside a clean piece of cheesecloth and secure the cloth tightly so the marbles remain contained.
The advantage is that the marbles provide enough weight to hold the cabbage down, while the cheesecloth keeps them together and makes removing them much easier.

Use a Smaller jelly jar filled with rocks
When making sauerkraut in a crock, you usually place a weighted plate over the cabbage to pack it down and keep it submerged. When fermenting in a mason jar, inserting a smaller jelly jar filled with rocks or marbles in the mouth of the larger jar serves the same purpose.
What About Rocks?
You may find older recipes or homesteading instructions that recommend using clean rocks as fermentation weights.
We don’t recommend this method.
Virginia Cooperative Extension specifically advises against using rocks because they may contain heavy metals, and some rocks, including limestone, can degrade in the salty, acidic environment of fermentation.
There is no reason to take that risk when there are inexpensive food-safe alternatives.
That said, purpose-made fermentation weights are designed specifically for this job, so they are our preferred option when making sauerkraut regularly.
Cheesecloth vs. a Fermentation Breather Lid
These two pieces of equipment serve different purposes.
Cheesecloth is a covering. It helps keep insects, dust, and other debris away from the fermentation container. Traditional sauerkraut instructions for larger containers use clean cheesecloth or a clean towel as a cover. Penn State Extension also describes covering a fermentation container with several layers of clean cheesecloth or a clean kitchen towel.
A fermentation breather lid or airlock is designed to manage fermentation gases. As fermentation takes place, gases are produced. A one-way valve or airlock allows those gases to escape while limiting the entry of outside air.
For small batches in Mason jars, we prefer a commercially available fermentation lid because it is convenient and keeps the jar covered while allowing gases to escape. Penn State’s small-batch sauerkraut directions specifically mention commercially available weights and one-way valve covers as an option.
Minnesota Extension also recommends an airtight fermentation container and notes that an airlock system can be used according to the manufacturer’s instructions.
Can You Use Just a Regular Jar Lid?
A regular canning lid is not the same as a fermentation breather lid.
If you are using a traditional fermentation method with a larger container and a loose cover, the fermentation gases need a way to escape. For a quart-jar method, a commercially available fermentation lid with a one-way valve is a simple way to accomplish this.
Penn State’s tested small-batch method also describes loosely covering the jar with a lid or clean towel so gases can escape, while noting that commercially available weights and one-way valve covers can be used instead.
What We Use
For this recipe, we use:
- Wide-mouth quart jars
- Glass fermentation weights
- Fermentation breather lids
- Jar rings
We like this setup because everything fits together easily and requires very little attention once the jars are prepared.
But if you are just getting started and don’t want to purchase special equipment, you can adapt the process using other food-safe methods for keeping the cabbage submerged and appropriately covering the fermentation container.
The equipment may vary, but the goal remains the same: keep the cabbage beneath the brine, keep the equipment clean, and provide an appropriate way for fermentation gases to escape.
Why Does Cabbage Turn into Sauerkraut?
It might seem a little strange the first time you make sauerkraut. You shred a head of cabbage, add salt, pack it into a jar, and then let it sit for several weeks. But there is a natural process happening inside that jar.
Salt draws moisture out of the cabbage, creating the brine that surrounds it. At the same time, naturally occurring lactic acid bacteria begin using the sugars in the cabbage. As they ferment those sugars, they produce acids that gradually make the cabbage more tart and create the familiar sour flavor of sauerkraut.
The increasing acidity also changes the environment inside the jar, allowing the desirable fermentation bacteria to thrive while making conditions less favorable for many unwanted microorganisms. That’s why the salt, brine, temperature, and keeping the cabbage submerged all matter.
So, no, the cabbage isn’t simply sitting in a jar and “getting sour.” Fermentation is a natural process that transforms fresh cabbage into the tangy sauerkraut we know and love.
Choosing the Right Cabbage
You don’t need a special variety of cabbage to make sauerkraut, but starting with a fresh, firm head will give you the best results. Late-season cabbage is often recommended because mature cabbage tends to have more of the natural sugars that help fermentation.
Green or Red Cabbage?
Green cabbage is the traditional choice and is what we use for this recipe. Red cabbage works beautifully too and makes a gorgeous purple or pink sauerkraut as it ferments.
You can also experiment with combining green and red cabbage if you’d like a little color without making an entirely red batch.
In general, sauerkraut works with many different cabbages:Green cabbage, red cabbage, napa cabbage, and other cabbage. Make individual batches or mix them up for a multi-colored sauerkraut!
Does Store-Bought Cabbage Work?
Absolutely. You don’t have to grow your own cabbage to make homemade sauerkraut. A fresh, firm head from the grocery store or farmers market works well.
If you’re harvesting cabbage from your garden, it is best to use firm, mature heads and begin the fermentation fairly soon after harvesting. The National Center for Home Food Preservation recommends starting sauerkraut within 24 to 48 hours after harvest for best quality.
What If My Cabbage Seems Dry?
Some heads of cabbage release quite a bit of juice when salted and massaged, while others seem much drier. That’s normal. The amount of natural moisture can vary from one head to another.
The important thing is that enough brine is released to keep the shredded cabbage completely submerged once it is packed into the jar. If you don’t have enough liquid to cover the cabbage, see the section below on adding more brine.
How Much Sauerkraut Will One Head Make?
The amount you get depends on the size and density of your cabbage. A large head will naturally make more than a small head.
As a general reference, the National Center for Home Food Preservation says that 5 pounds of cabbage makes about 2 quarts of sauerkraut.
For this recipe, we weigh the cabbage after shredding rather than relying on the size of the head. That gives us a much more consistent way to determine how much salt to use.
How Much Salt Should You Use?
Salt is one of the most important parts of making sauerkraut. It isn’t just there for flavor. Salt helps draw moisture from the cabbage, encourages the desirable fermentation bacteria, and helps create an environment where unwanted microorganisms are less likely to thrive.
For this recipe, we use 2% canning salt based on the weight of the shredded cabbage. That’s why a kitchen scale is so helpful.
For example, if your shredded cabbage weighs 1,000 grams, you would use 20 grams of salt. If it weighs 1,500 grams, you would use 30 grams of salt.
Weighing the cabbage takes the guesswork out of the process. A large head of cabbage can weigh considerably more than a small one, so measuring the salt based on the actual amount of cabbage gives you a consistent ratio from batch to batch.
Why Canning Salt?
We use canning or pickling salt because it is pure salt without the additives commonly found in some table salts. Additives can affect the appearance of fermented vegetables by causing cloudiness or sediment. Penn State Extension specifically recommends canning or pickling salt for sauerkraut.
Because salt plays an important role in fermentation, don’t simply reduce the amount because you prefer a less salty taste. If you want less salt in the finished sauerkraut, it’s better to follow a fermentation formula that has been developed and tested for a lower salt concentration rather than changing the salt amount on your own.
What Temperature Is Best for Fermenting Sauerkraut?
Temperature has a big effect on how quickly sauerkraut ferments.
For traditional sauerkraut fermentation, 70–75°F is a commonly recommended temperature range. At this temperature, fermentation generally takes about three to four weeks. If the temperature is cooler, fermentation takes longer. For example, Penn State Extension notes that 60–65°F fermentation may take up to six weeks.
We don’t recommend putting the jar somewhere warm just to speed things up. Temperatures that are too warm can lead to softer sauerkraut and increase the chance of spoilage. Penn State advises avoiding temperatures above 80°F.
If your house is a little cooler, don’t assume something has gone wrong just because you aren’t seeing dramatic activity right away. A cooler fermentation simply takes longer.
What Should Sauerkraut Look and Smell Like While Fermenting?
This is probably one of the biggest concerns for someone making sauerkraut for the first time. After all, you’re intentionally leaving vegetables in a jar for several weeks. It helps to know what is normal.
Normal Signs of Fermentation
You may notice:
- Small bubbles forming in the brine
- The brine becoming cloudy
- The cabbage softening somewhat
- The brine moving or rising in the jar
- A pleasantly sour or tangy smell
- The cabbage gradually developing that familiar sauerkraut flavor
The amount of bubbling can vary, so don’t worry if your jar isn’t constantly bubbling. Fermentation is affected by temperature and other conditions.
As the fermentation progresses, the cabbage becomes increasingly acidic and develops its characteristic tart flavor.
Signs That Something Is Wrong
There are some things you should not try to taste your way through.
If you notice mold, a slimy texture, or a foul or unusual odor, the sauerkraut should be discarded rather than tasted to see if it is okay.
A little cloudiness in the brine by itself doesn’t necessarily mean the batch has gone bad. Look at the overall appearance, smell, and texture rather than judging the fermentation by one characteristic alone.
What If There Isn’t Enough Brine?
The cabbage needs to remain covered by brine throughout fermentation. As the cabbage releases its moisture and settles, you may find that the liquid level isn’t quite where you expected it to be.
Don’t simply add plain water. Adding water changes the salt concentration of the fermentation.
For an established sauerkraut fermentation, Penn State Extension recommends adding boiled and cooled brine when the liquid level has fallen below the cabbage. Their guidance uses 1½ tablespoons of salt per quart of water for this supplemental brine.
Before adding anything, check the cabbage carefully. If portions above the brine have dried out, become discolored, or show mold growth, follow the food-safety guidance for discarding affected or questionable batches rather than simply topping them off.
The goal is always the same: keep the cabbage submerged beneath the brine.

Why Does the Cabbage Need to Stay Under the Brine?
Keeping the cabbage underneath the brine is one of the most important parts of successful fermentation.
The salty brine creates the environment in which the fermentation takes place. Keeping the cabbage submerged also limits its exposure to oxygen at the surface, which helps reduce the opportunity for surface molds and other unwanted growth.
That’s why fermentation weights are so useful. They aren’t just there to make the jar look like a proper fermentation setup—they have an important job.
As the cabbage settles during fermentation, the weight helps keep the shredded cabbage underneath the liquid. The National Center for Home Food Preservation recommends keeping fermented cabbage about 1 to 2 inches beneath the brine in larger fermentation containers.
For small Mason-jar batches, the amount of headspace and the type of weight you use will vary. However, the same basic principle applies: cabbage below the brine is what we’re aiming for.
Troubleshooting Homemade Sauerkraut
Even when you follow the recipe carefully, each batch can behave a little differently. Cabbage varies in moisture, the temperature in your home changes, and fermentation is a natural process rather than an exact timer.
Here are some of the most common things you may notice.
| What You Notice | Possible Reason | What to Know |
| It’s not very sour yet | It may need more time | Fermentation speed depends on temperature and other conditions. |
| It tastes quite salty | Salt is part of the fermentation process | The flavor can change as fermentation continues. |
| There isn’t much liquid | The cabbage may have been naturally drier | The cabbage needs to remain submerged; use an appropriate prepared brine if needed. |
| The brine is cloudy | Normal fermentation can change the appearance of the brine | Cloudiness by itself doesn’t necessarily mean the batch has spoiled. |
| The cabbage is softer than expected | Temperature or length of fermentation can affect texture | Warmer fermentation can result in softer cabbage. |
| There is a foul odor | Possible spoilage | Do not taste it. Discard the batch. |
| The cabbage is slimy | Possible spoilage | Do not taste it. Discard the batch. |
| There is mold | The cabbage may have been exposed above the brine | Do not taste moldy sauerkraut; follow food-safety guidance and discard questionable batches. |
One thing we have learned with fermentation is that not every difference means something has gone wrong. A batch can ferment more slowly, develop flavor at a different rate, or look slightly different from the last batch.
When in doubt, though, it’s better to be cautious with fermented foods. If the sauerkraut has a foul odor, slimy texture, or visible mold, don’t taste it to see if it is safe.
How Do You Know When Sauerkraut Is Finished?
There isn’t one exact day when every batch of sauerkraut is suddenly finished.
Temperature, cabbage, moisture, and your own taste preferences all play a role. At the commonly recommended 70–75°F fermentation temperature, sauerkraut often takes about three to four weeks, but cooler temperatures can extend that time.
For our recipe, we start checking the flavor at about three weeks. If it has the sourness we like, fermentation is finished for our purposes. If we’d like it more tangy, we can let it continue fermenting and check again later.
Think of the suggested time as a guide rather than a deadline.
The finished sauerkraut should have a pleasantly tart flavor and a firm texture, without mold, sliminess, or an unusual odor. Once it has reached the flavor you like, move it to the refrigerator to slow the fermentation and preserve it for later.
A Traditional Preservation Method for Today’s Homestead
Fermenting cabbage is a simple reminder that preserving food doesn’t always require complicated equipment.
A head of cabbage, some salt, a couple of jars, and a little patience can give you something completely different from the fresh cabbage you started with.
Whether your cabbage came from your own garden or the farmers market, homemade sauerkraut is an easy project to add to your homesteading routine.
And once you get comfortable with the process, you may find yourself looking at that extra cabbage in the garden a little differently.
More Information About Fermentation
If you’re new to fermenting vegetables, it is worth reading information from university extension services and the National Center for Home Food Preservation before experimenting with different equipment or fermentation methods.
- National Center for Home Food Preservation — Suitable Containers, Covers, and Weights for Fermenting Food — Information on appropriate containers, covers, and ways to keep vegetables submerged.
- Penn State Extension — Let’s Preserve: Fermentation—Sauerkraut and Pickles — Detailed research-based guidance, including small-batch sauerkraut made in quart jars.
- University of Minnesota Extension — Preserving Food at Home: Fermentation — General guidance on fermentation containers, weights, brine, and airlocks.
- Virginia Cooperative Extension — Vegetable Fermentation — Detailed information about fermentation equipment, food-safe weights, temperatures, and safety considerations.
Stay connected with Hobby Homestead
Add Hobby Homestead as a preferred source in Google Search to make it easier to find our articles when you're searching for recipes, gardening tips, preserving ideas, and more.


This worked exactly as written, thanks!